Purchase a Membership
Using Drips, it's easy for any user to access a membership to a Community, receive a NFT membership token and gain access to any benefits that the membership includes.
If you're interested in becoming a supporter, but don't have a specific Community in mind, you can head over to the Explore Page to browse the different Communities which have memberships available via the Drips webapp.
The rest of this guide will assume that you've selected a Community you wish to purchase a membership for, and will walk through the steps required to do so.
FYI, there are several ways to interact with the Drips protocols and components, as laid out here and here.
Ready to see how it works via the Drips webapp? Let's go!
Note: we recommended that you Connect a Wallet before you begin the process of purchasing a membership. You'll need to have a wallet connected to complete the process and it's easiest to do it first.
Purchase a Membership
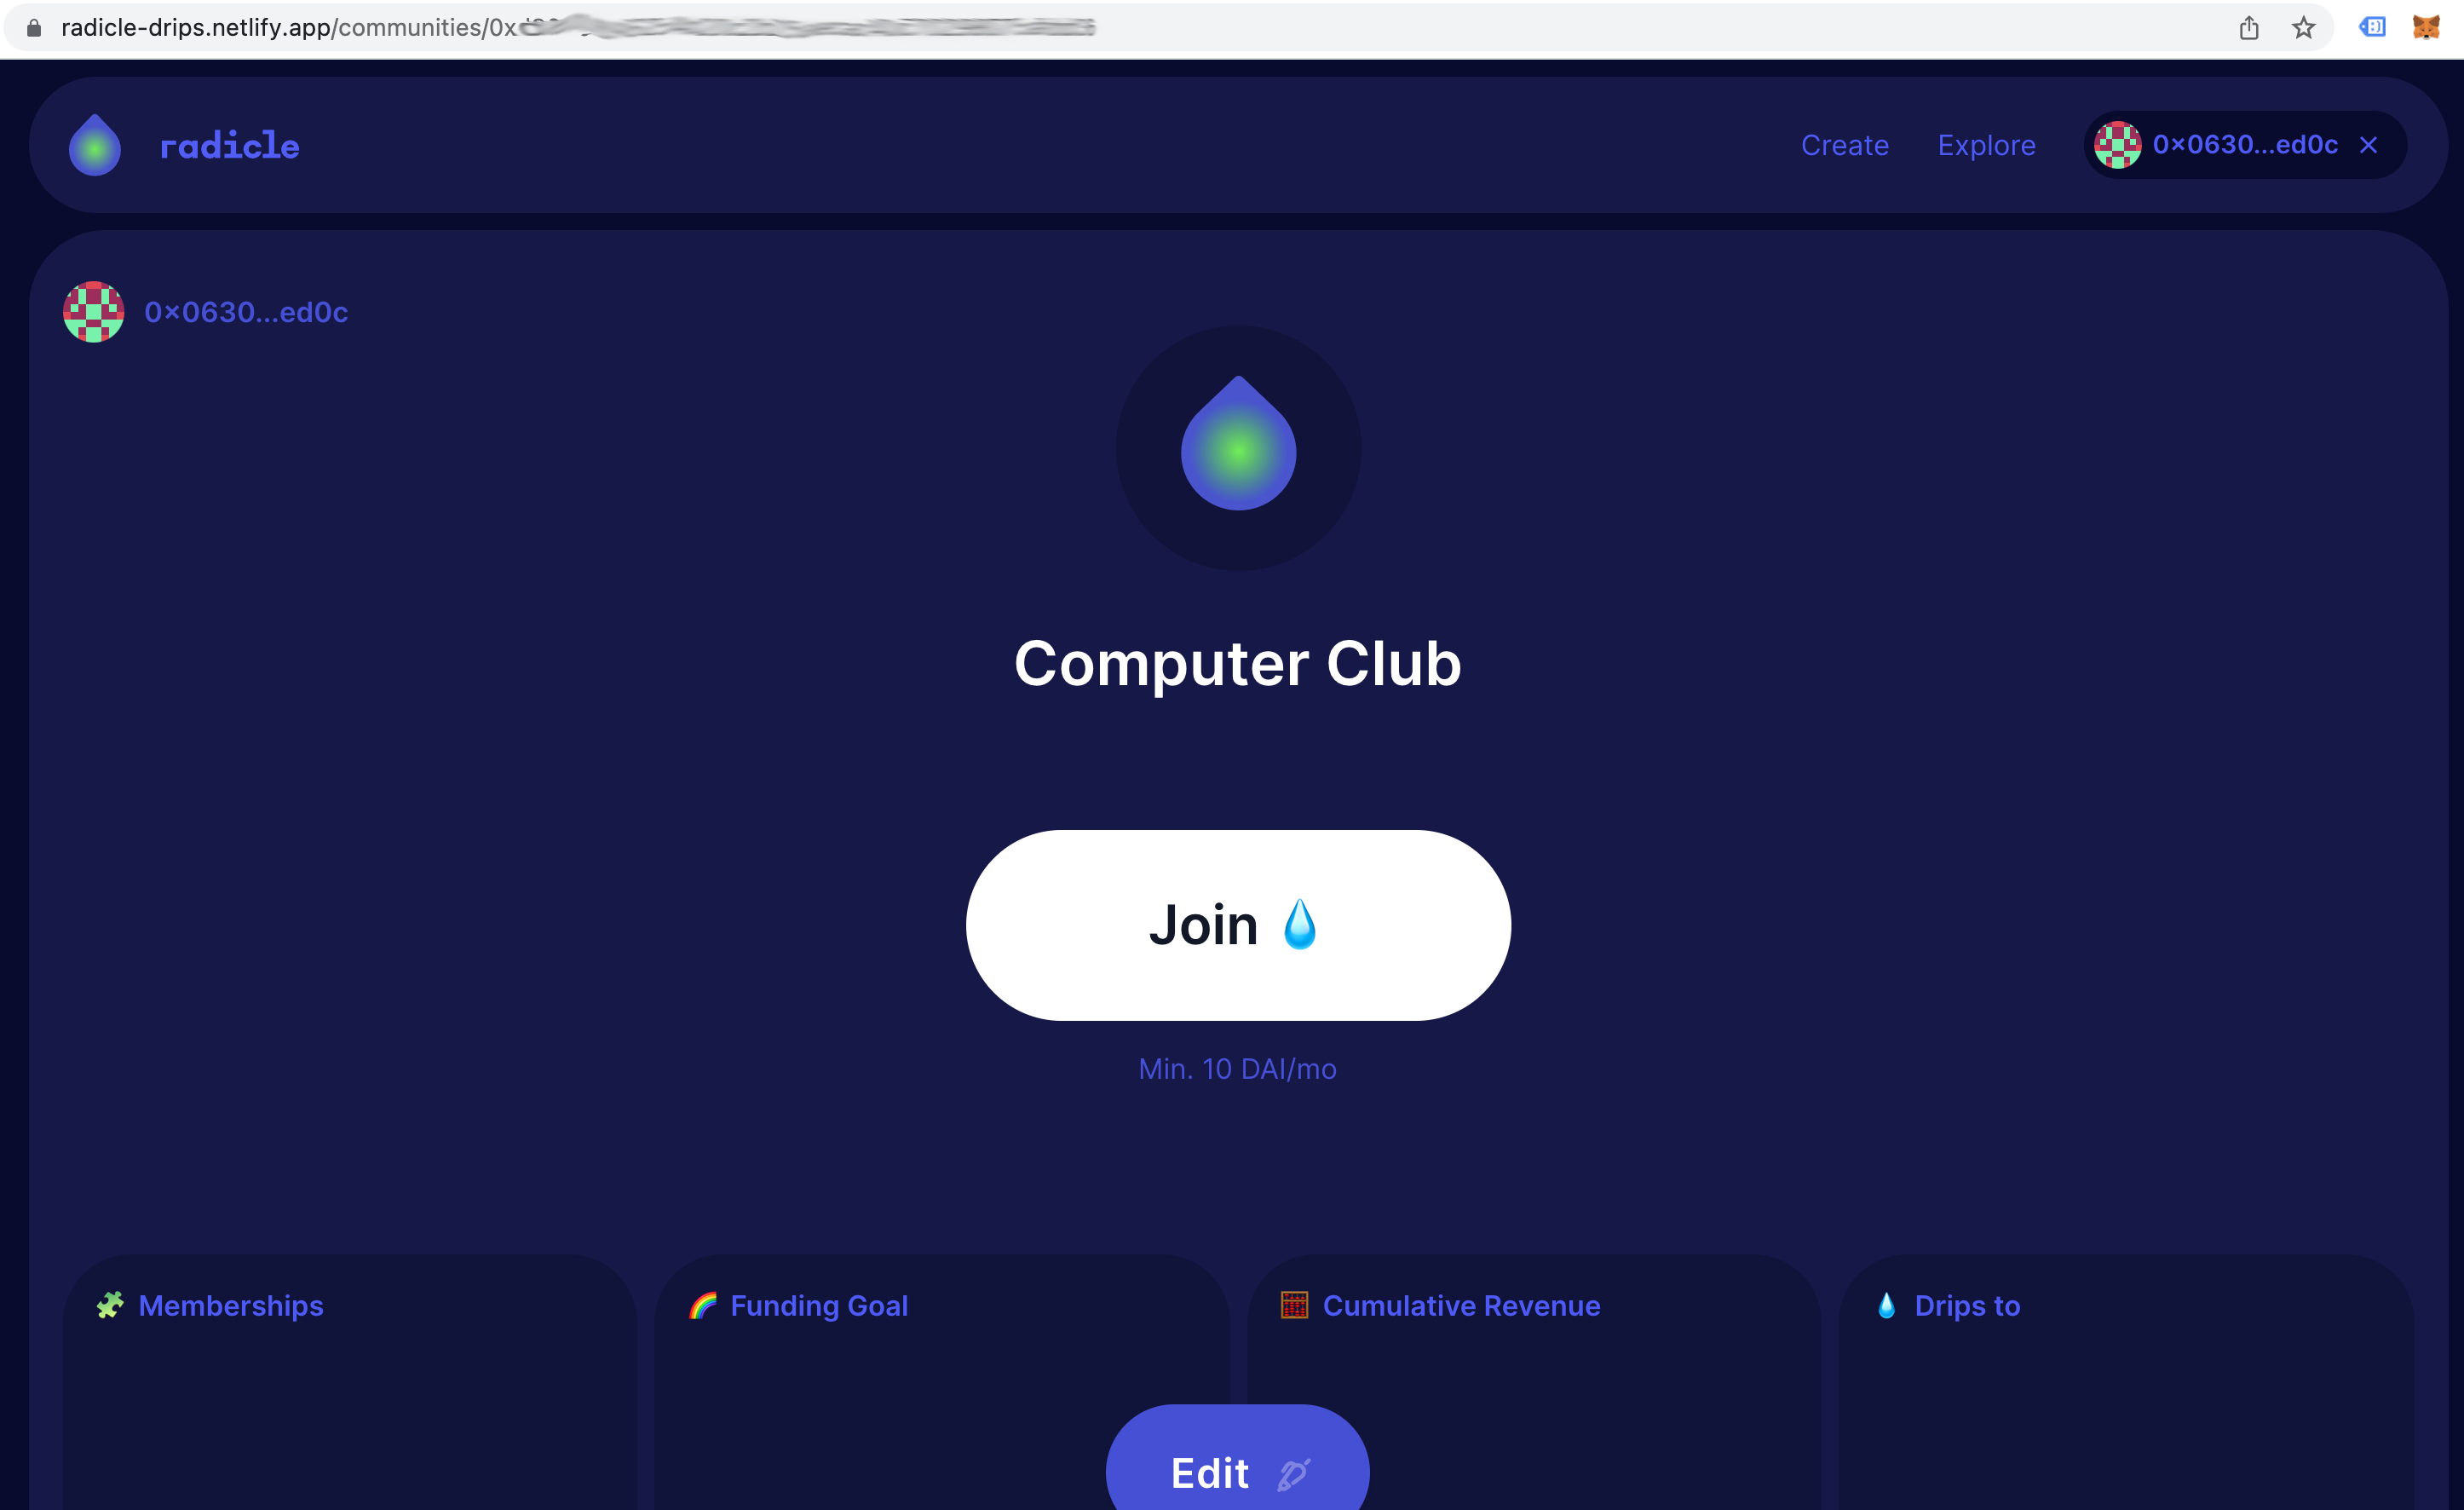
If you know the Community you want to become a member of and you have your wallet connected, you're ready to go! You're ready to navigate to the page for the Community you wish to purchase a membrship for in the Drips web app.
Once there, click on the big "Join" button in the middle of that page.

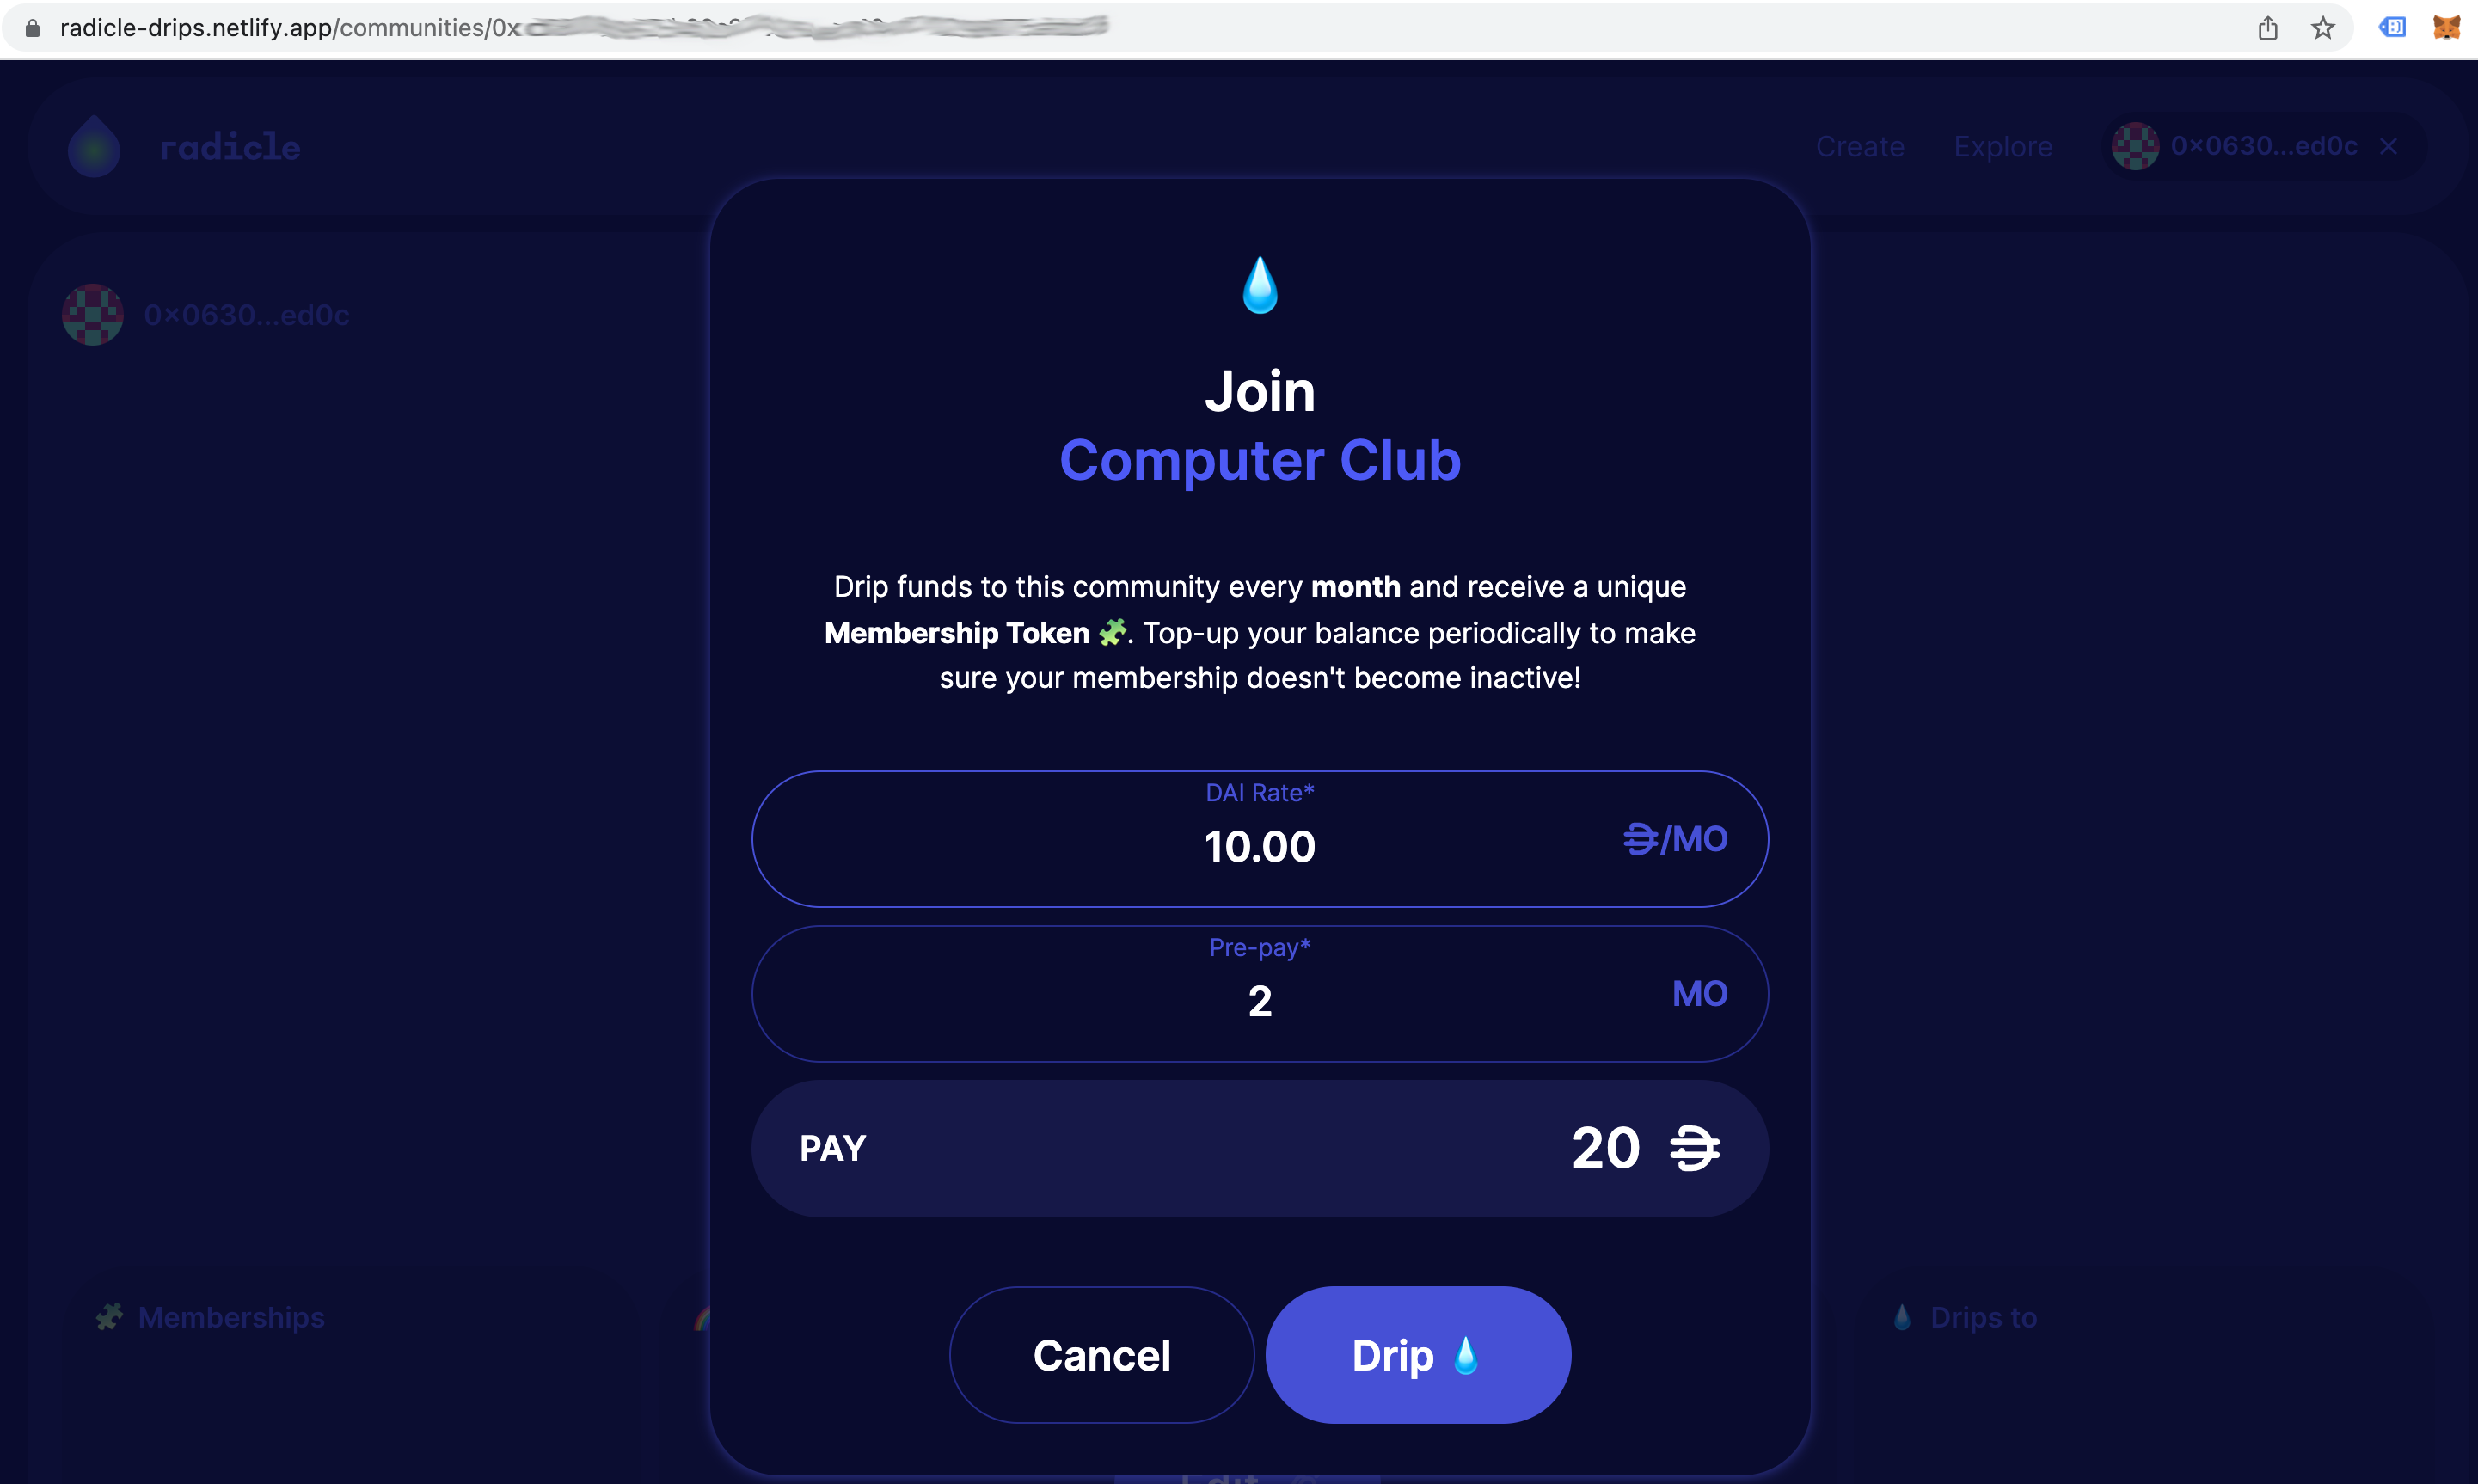
Here you will decide on the amount of funds you wish to donate each month (30 days) to support the community. The "DAI Rate" box will be pre-populated with the minimum, so whatever amount you choose must be equal to or greater than this initial value (10 DAI / month in the example below).
You will also need to decide how much DAI you would like to "pre-pay" and lock up in the member token NFT you will receive.
Member tokens function like pre-paid phone cards, where you must lock up DAI in them in advance to cover upcoming donations. However, unlike a pre-paid phone card, you can always withdraw any DAI that is locked up in the member token but which has not yet been donated (i.e. any DAI that would be used to cover future months).
The amount to the right of "Pay" is the amount of DAI that will be withdrawn from your wallet and placed into the member token during this step, so make sure that you have that amount of DAI available in your wallet and that you are willing to lock it up in the membrship token.
Once you have decided on values for the DAI Rate and Pre-pay amounts, click "Drip" to proceed.

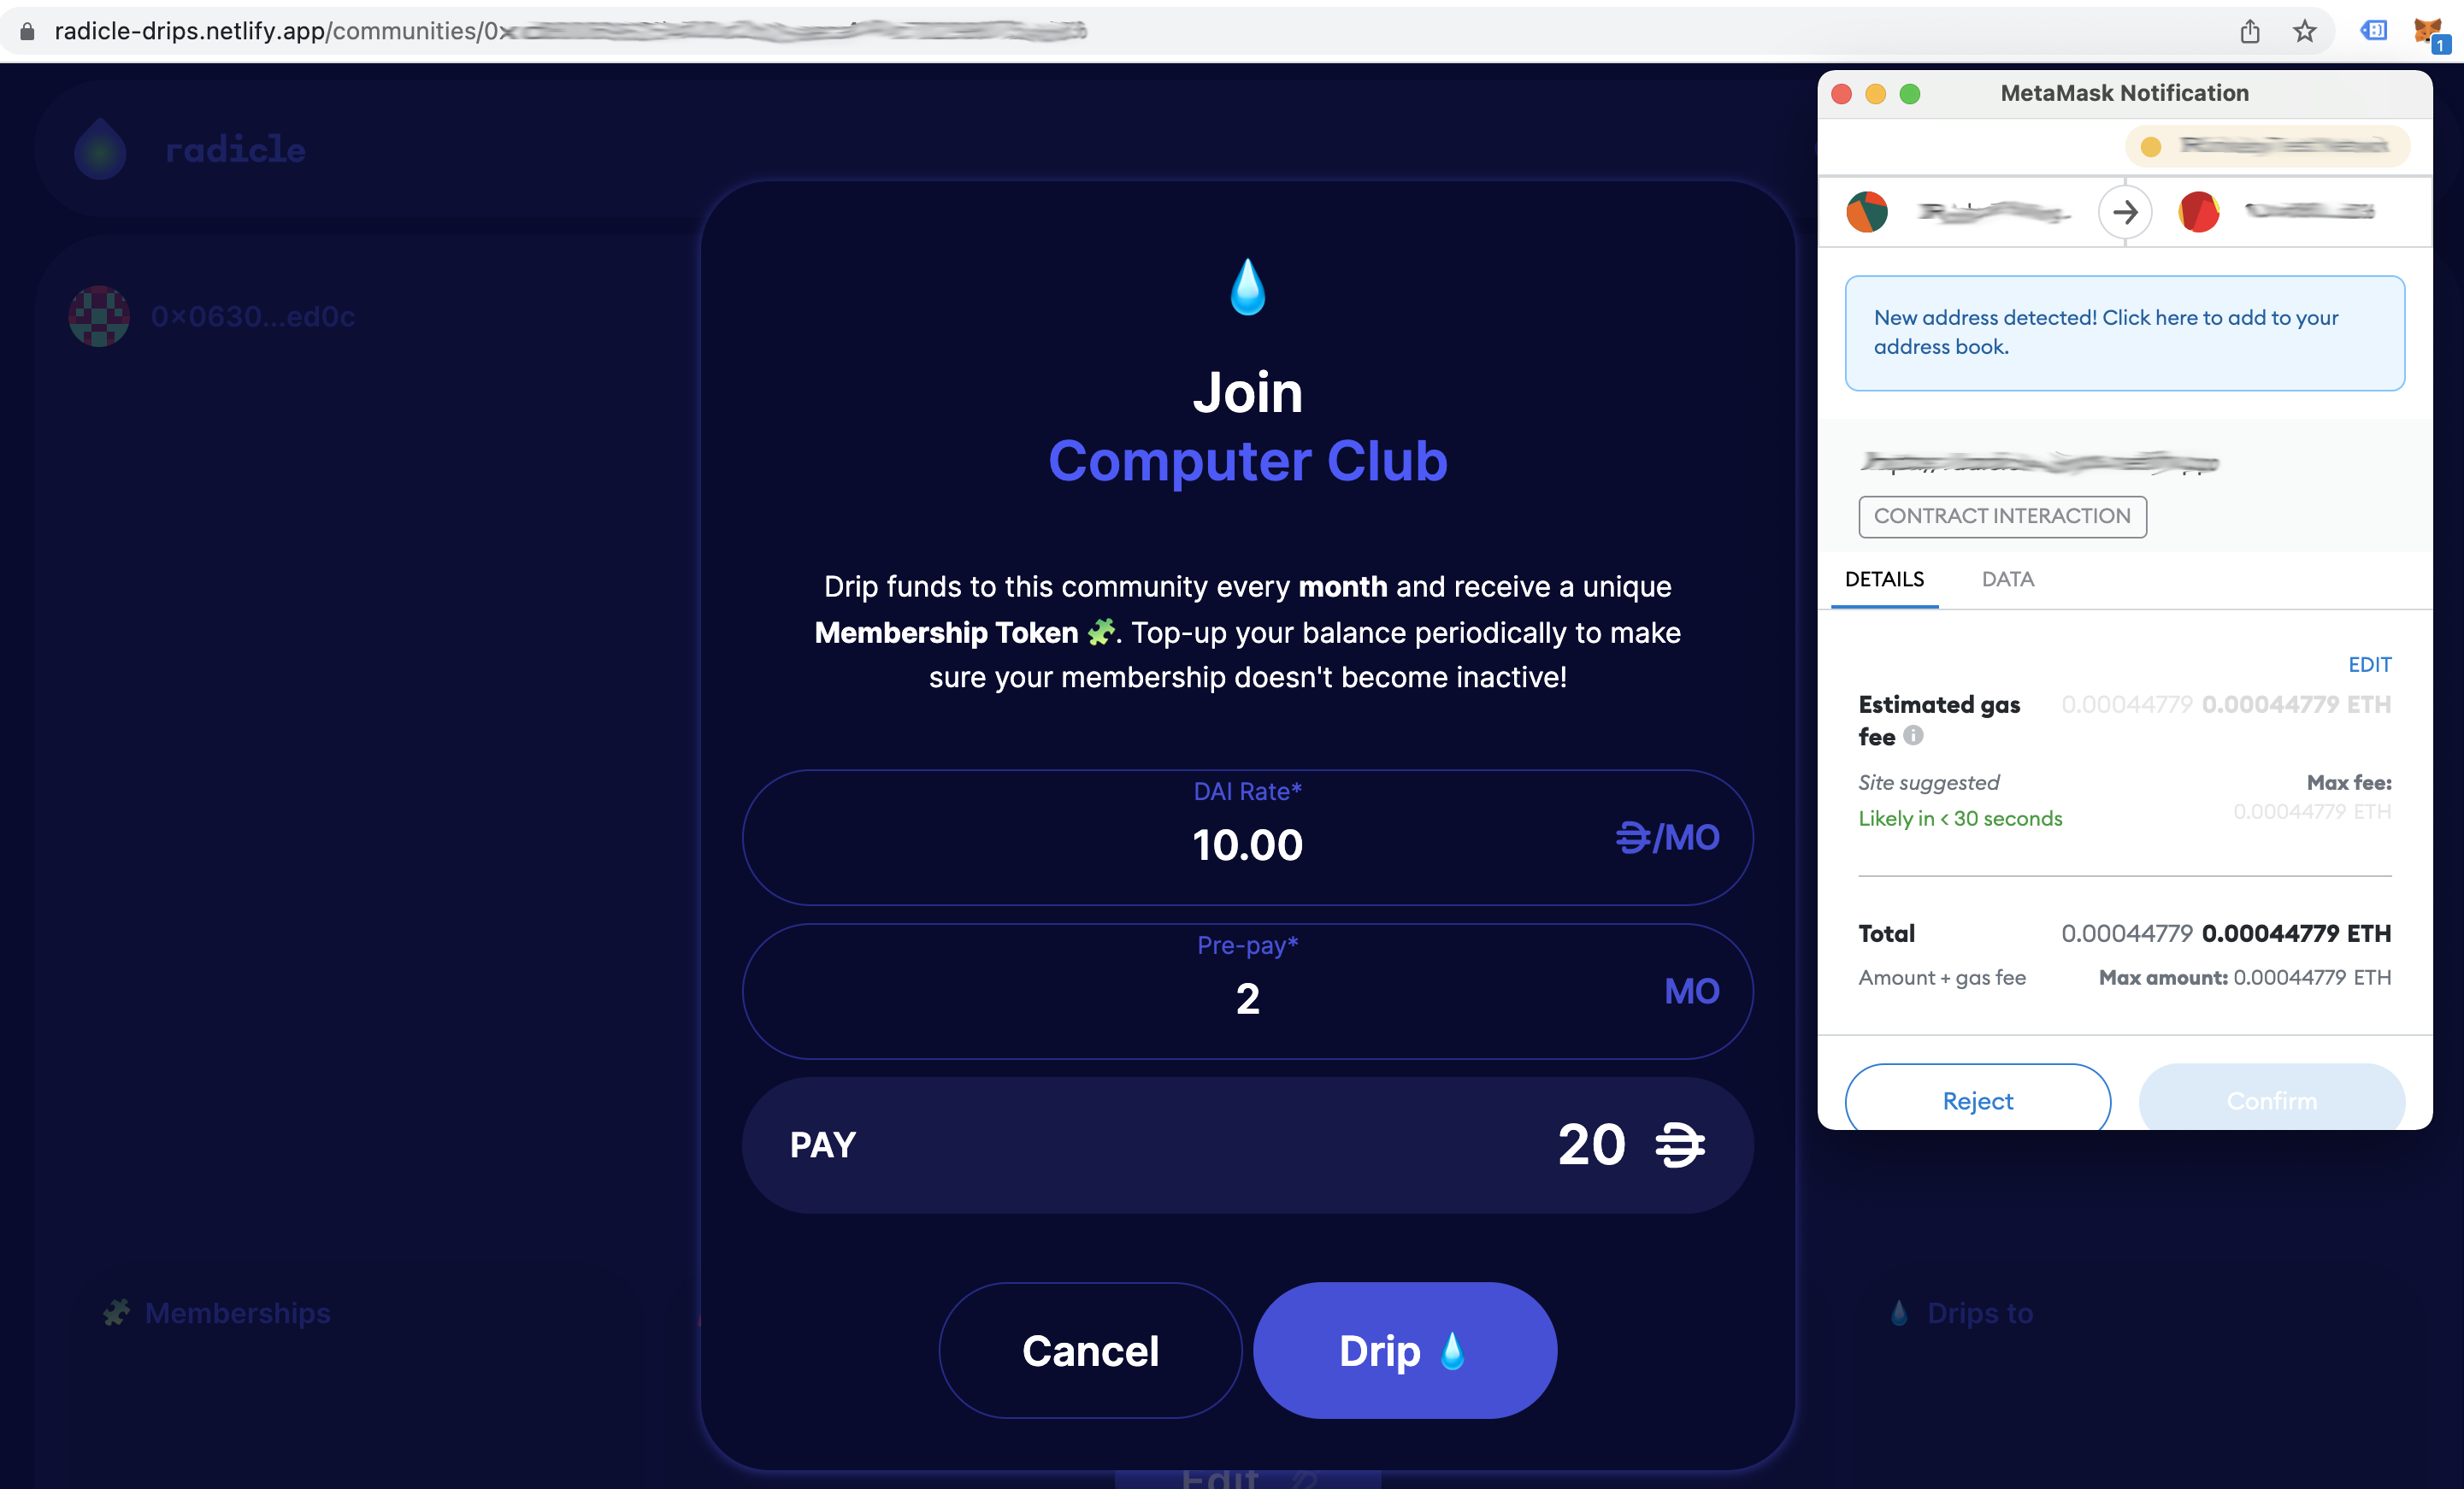
At this point you will then be prompted by your wallet to confirm the transaction. This will look a little different depending on which Wallet you're using, but the way it looks in Metamask is shown below.

Once you confirm the transaction, you will need to wait for it to be sent to the Ethereum blockchain and confirmed there as well. This typically takes between 30 seconds and 2 minutes.
Once the transaction has been confirmed, you will be sent back to the main project page.
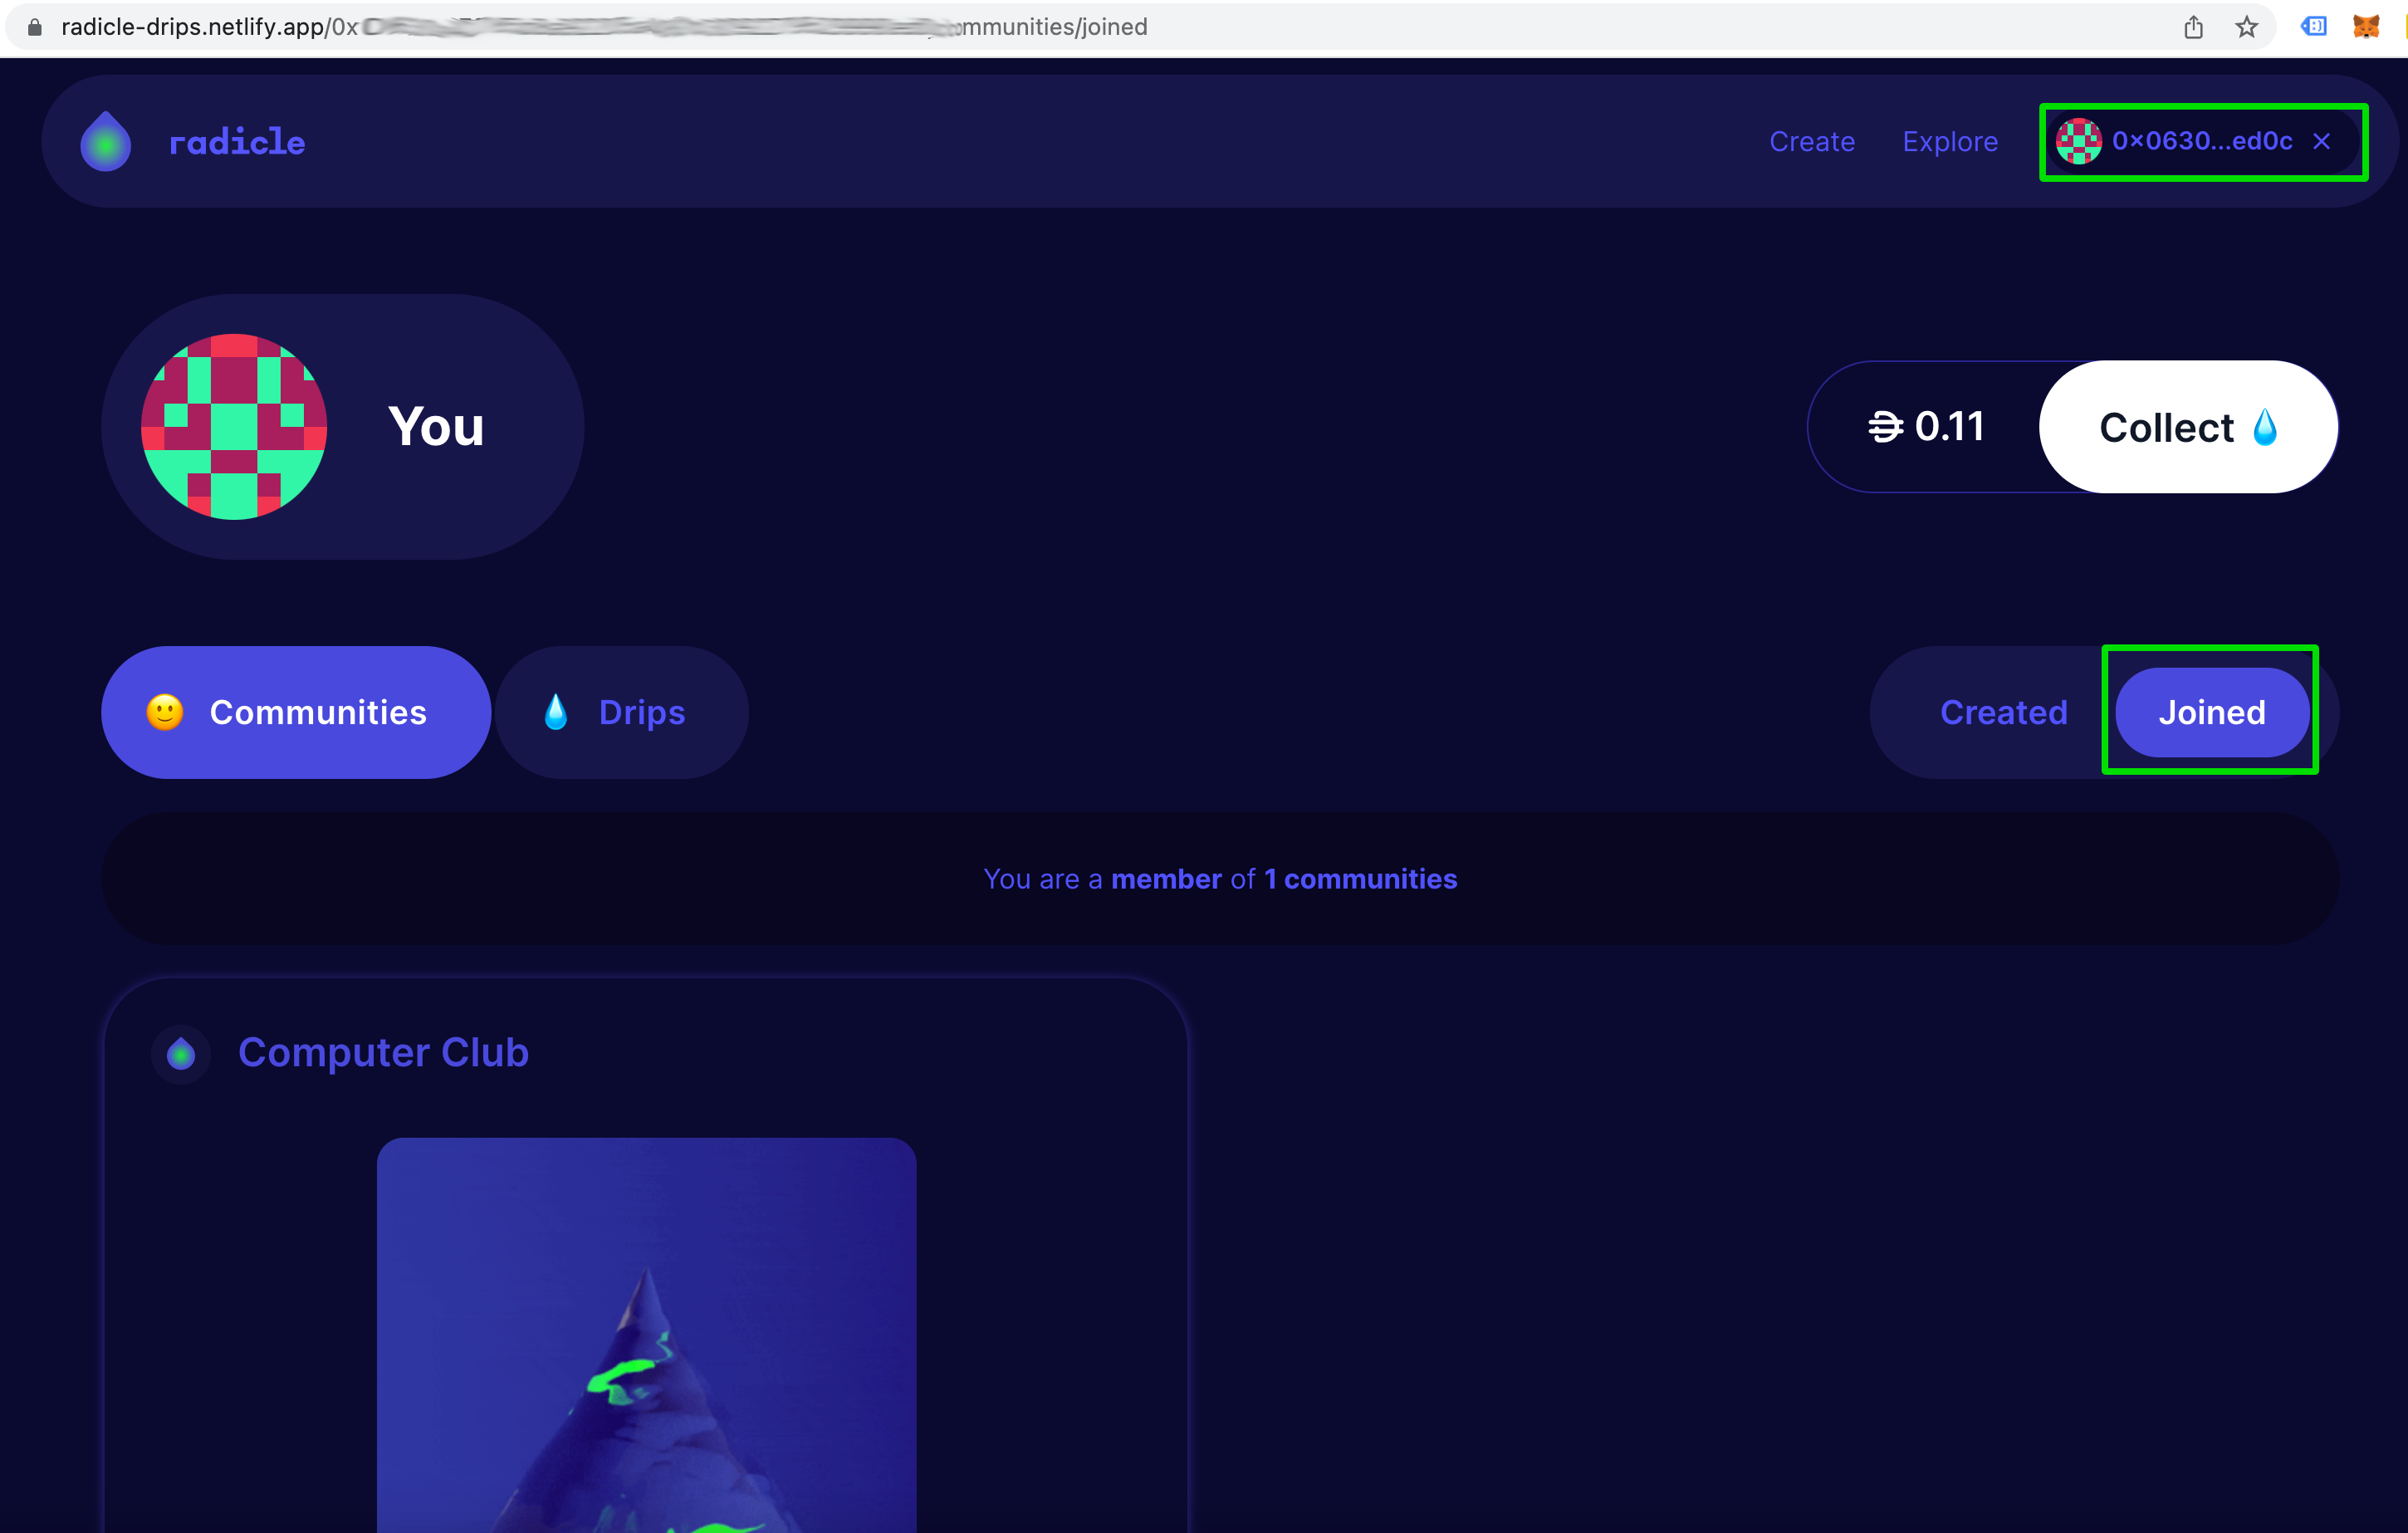
If you would like to check that you received your member token, click on your Ethereum address in the top right corner of the page. This should take you to the user page for your address. To see the member tokens you currently hold, toggle the slider on the right from "Created" to "Joined". You should see the NFT for the Community that you just joined displayed in the list.

That's it! You're now a token-holding member of the Community!
