Create a Community
This is a guide for creators or developers who wish to set up a Community and generate member NFT tokens to crowdsource funds from their fans. FYI, there are several ways to interact with the Drips protocols and components, as laid out here and here.
Let's jump in and see how it works using the Drips webapp!
First, open a new browser tab and navigate to https://drips.network/.
Note: we recommended that you Connect a Wallet before you start creating a community. You'll need to have a wallet connected to complete the process and it's easiest to do it first.
Note: if you would like to use a Gnosis Safe instead of an ordinary Ethereum address, please see here for details on how to connect and use a Gnosis Safe with Drips.
Once you have a wallet connected, click on the 'Create' button.

You'll be taken to the first screen in the Community creation flow.
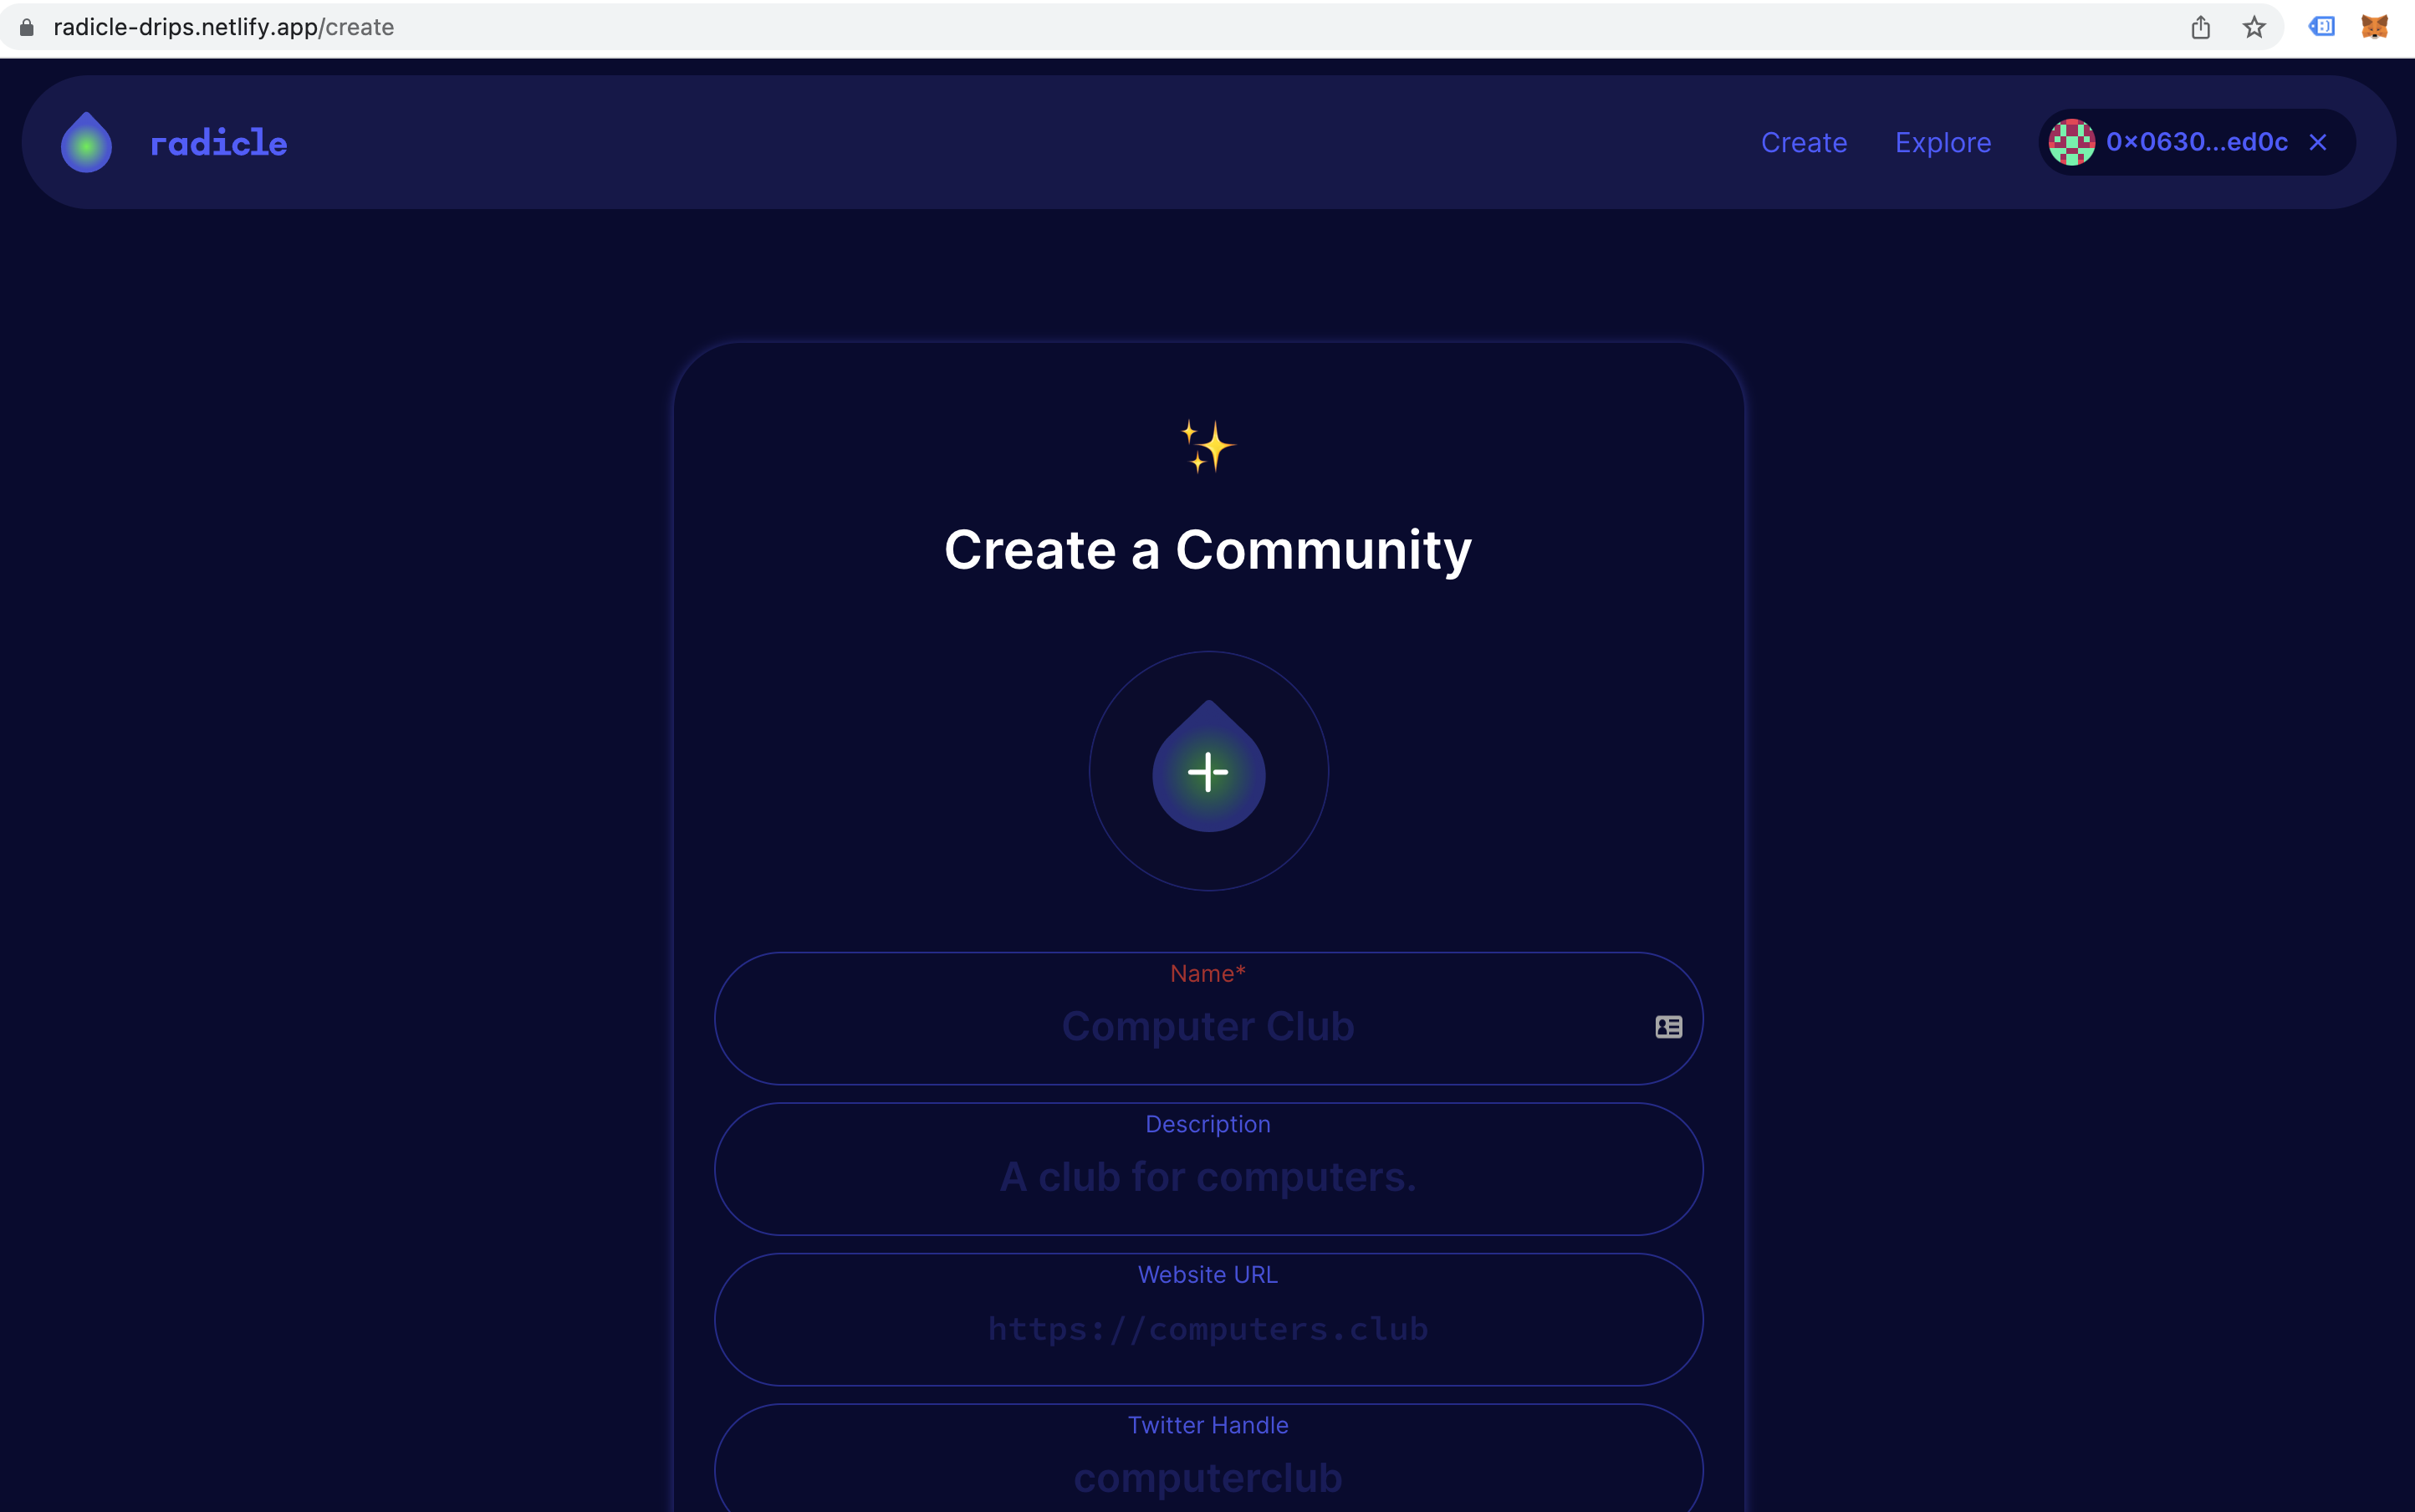
Start by filling out basic information about your Community, including any links to social media accounts. Then click "Next".
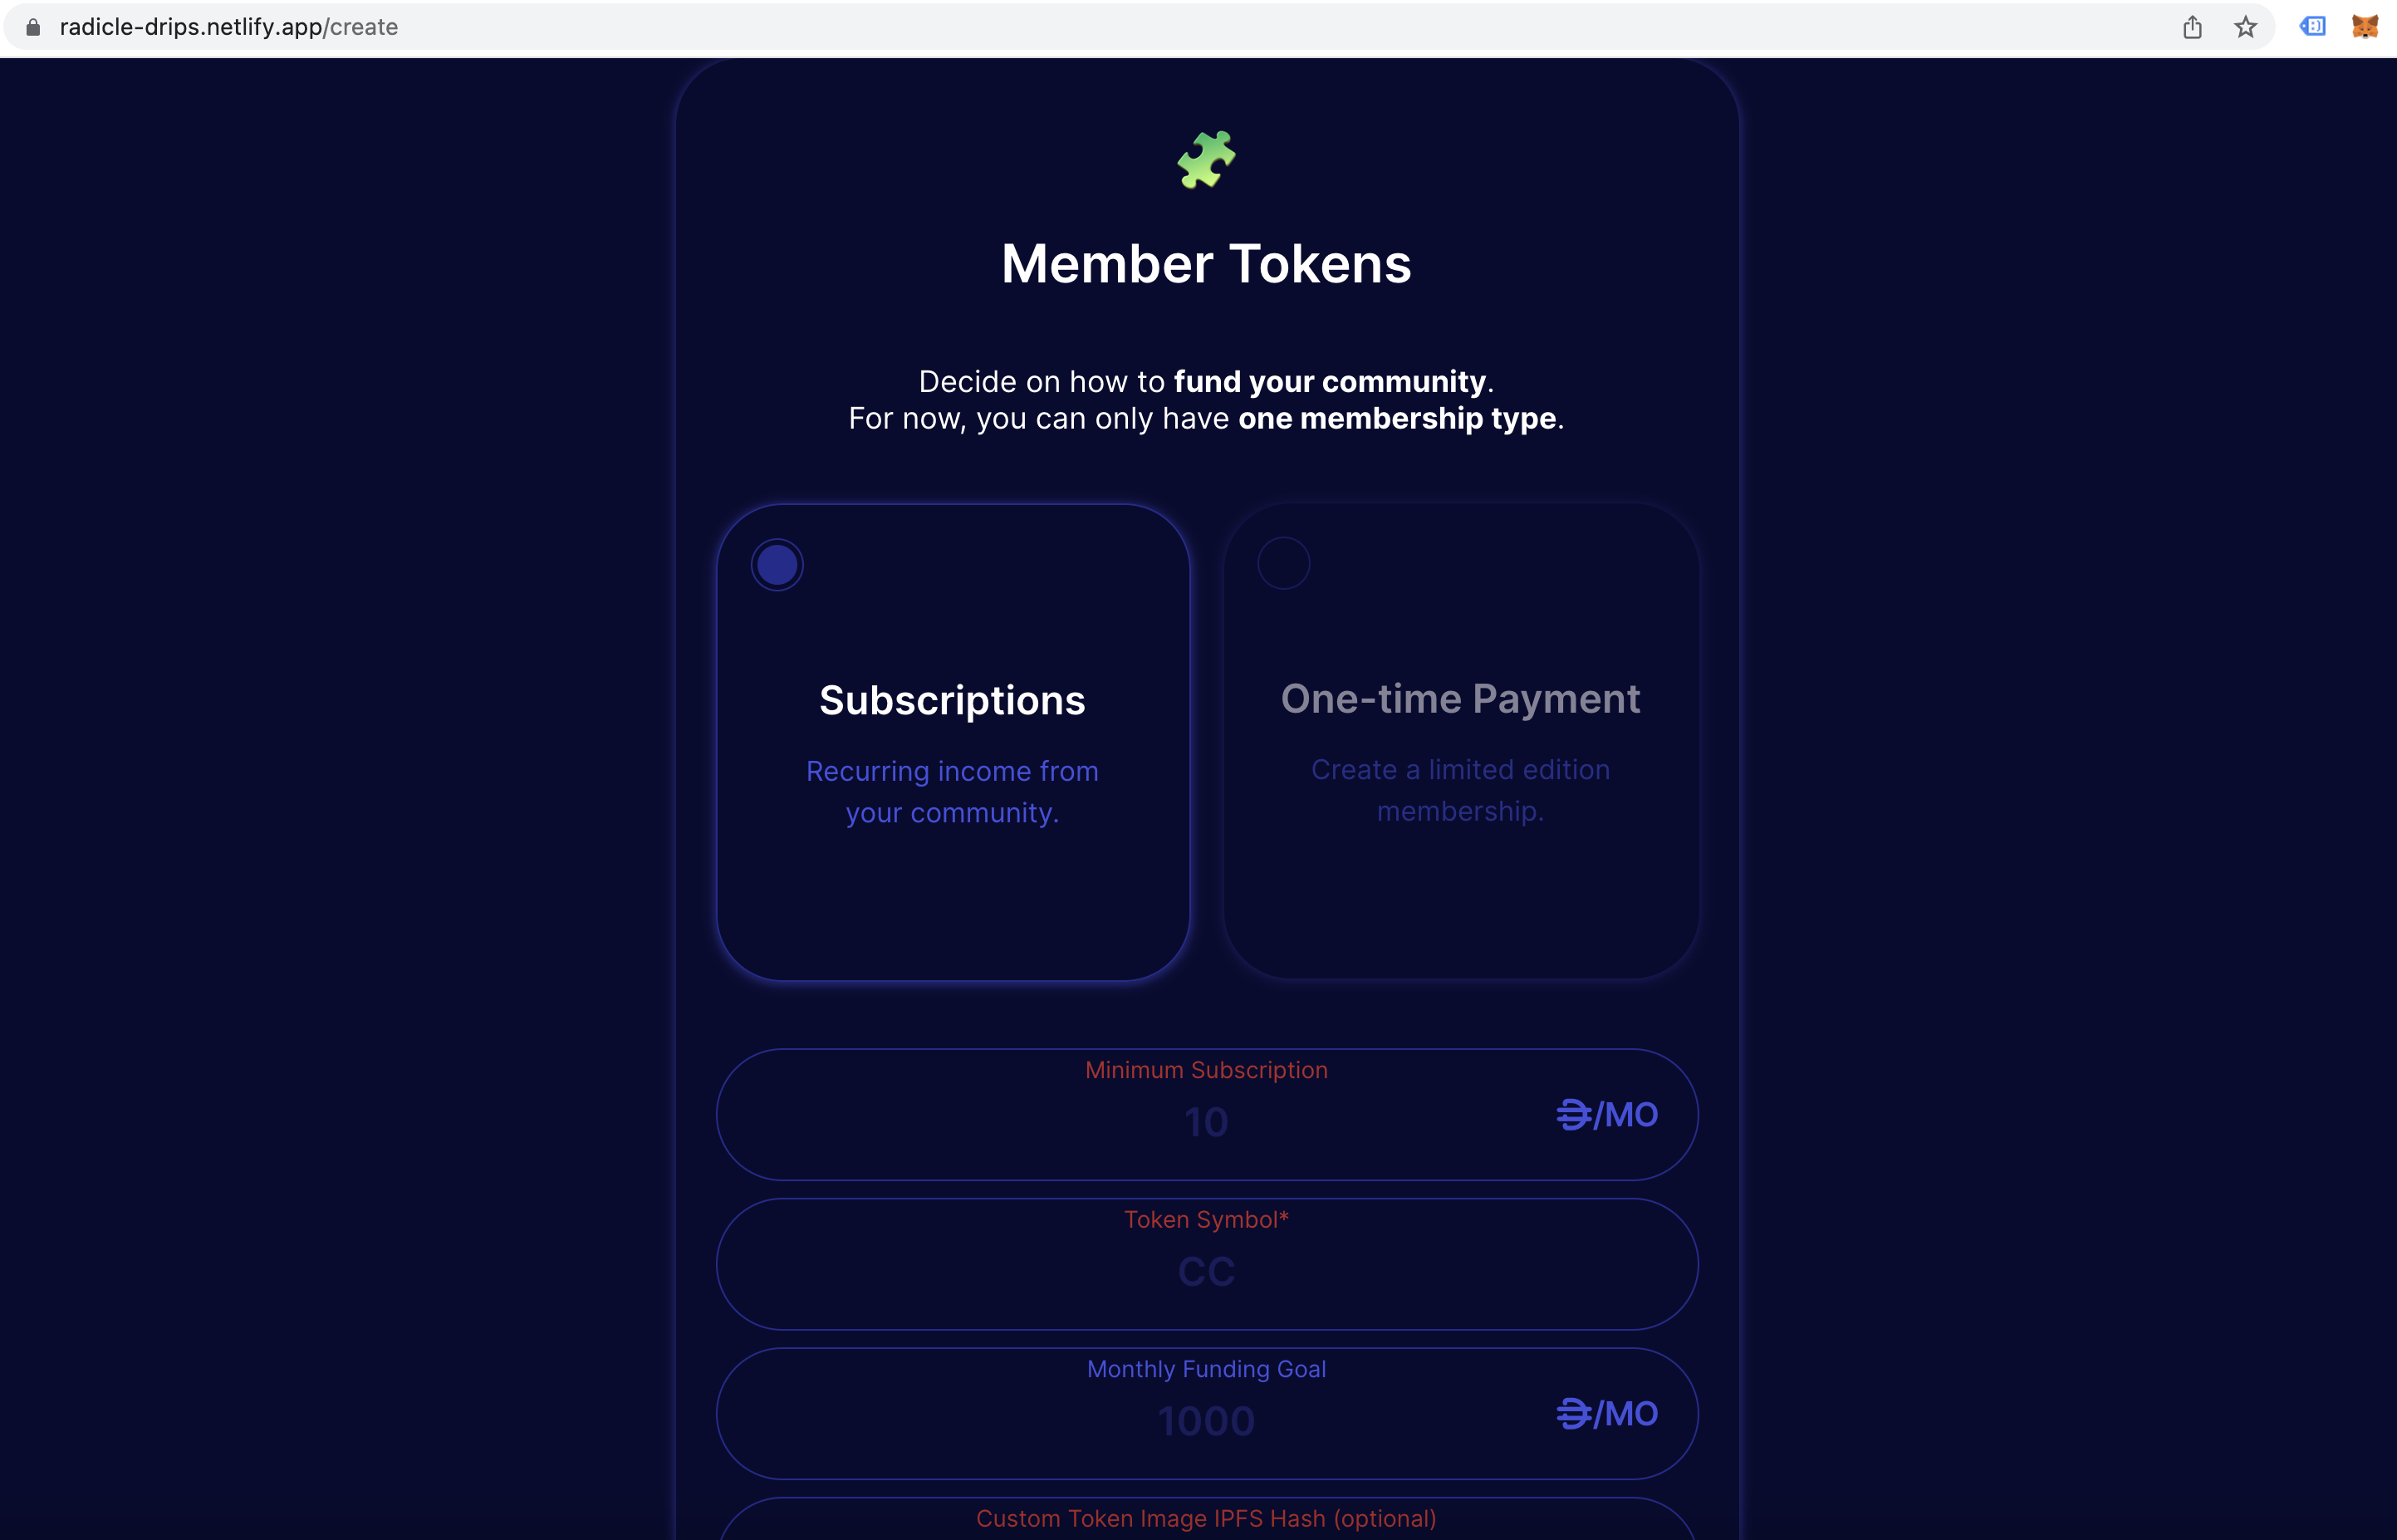
Here you'll be able to configure details for the "member tokens" (NFT membership badges) that your supporters will receive. A few notes:
- Minimum subscription is the minimum monthly funding amount that supporters must commit to drip to you in order to become a member.
- Token Symbol is the symbol that will be associated with your member tokens, and is a standard value that all NFTs must define as part of the ERC-721 standard. If you're not certain about what to enter, you should choose a short text string that you feel represents your community. For instance, if the name of your community is "Computer Club", you might choose "COMP" for the symbol.
- Monthly Funding Goal (optional) is a way for you to let your fans know the total amount of funds you hope to raise each month through Drips.
- Custom Token Image IPFS Hash (optional) allows you define a custom image that will appear on your community's member tokens when they are viewed in the Drips web app, or on sites like Opensea, by entering the hash of the image in IPFS. Instructions on how to upload an image to IPFS are beyond the scope of this guide, and in order to use this functionality it is probably best to be an advanced user.
After filling these out, click "Next" again to continue.
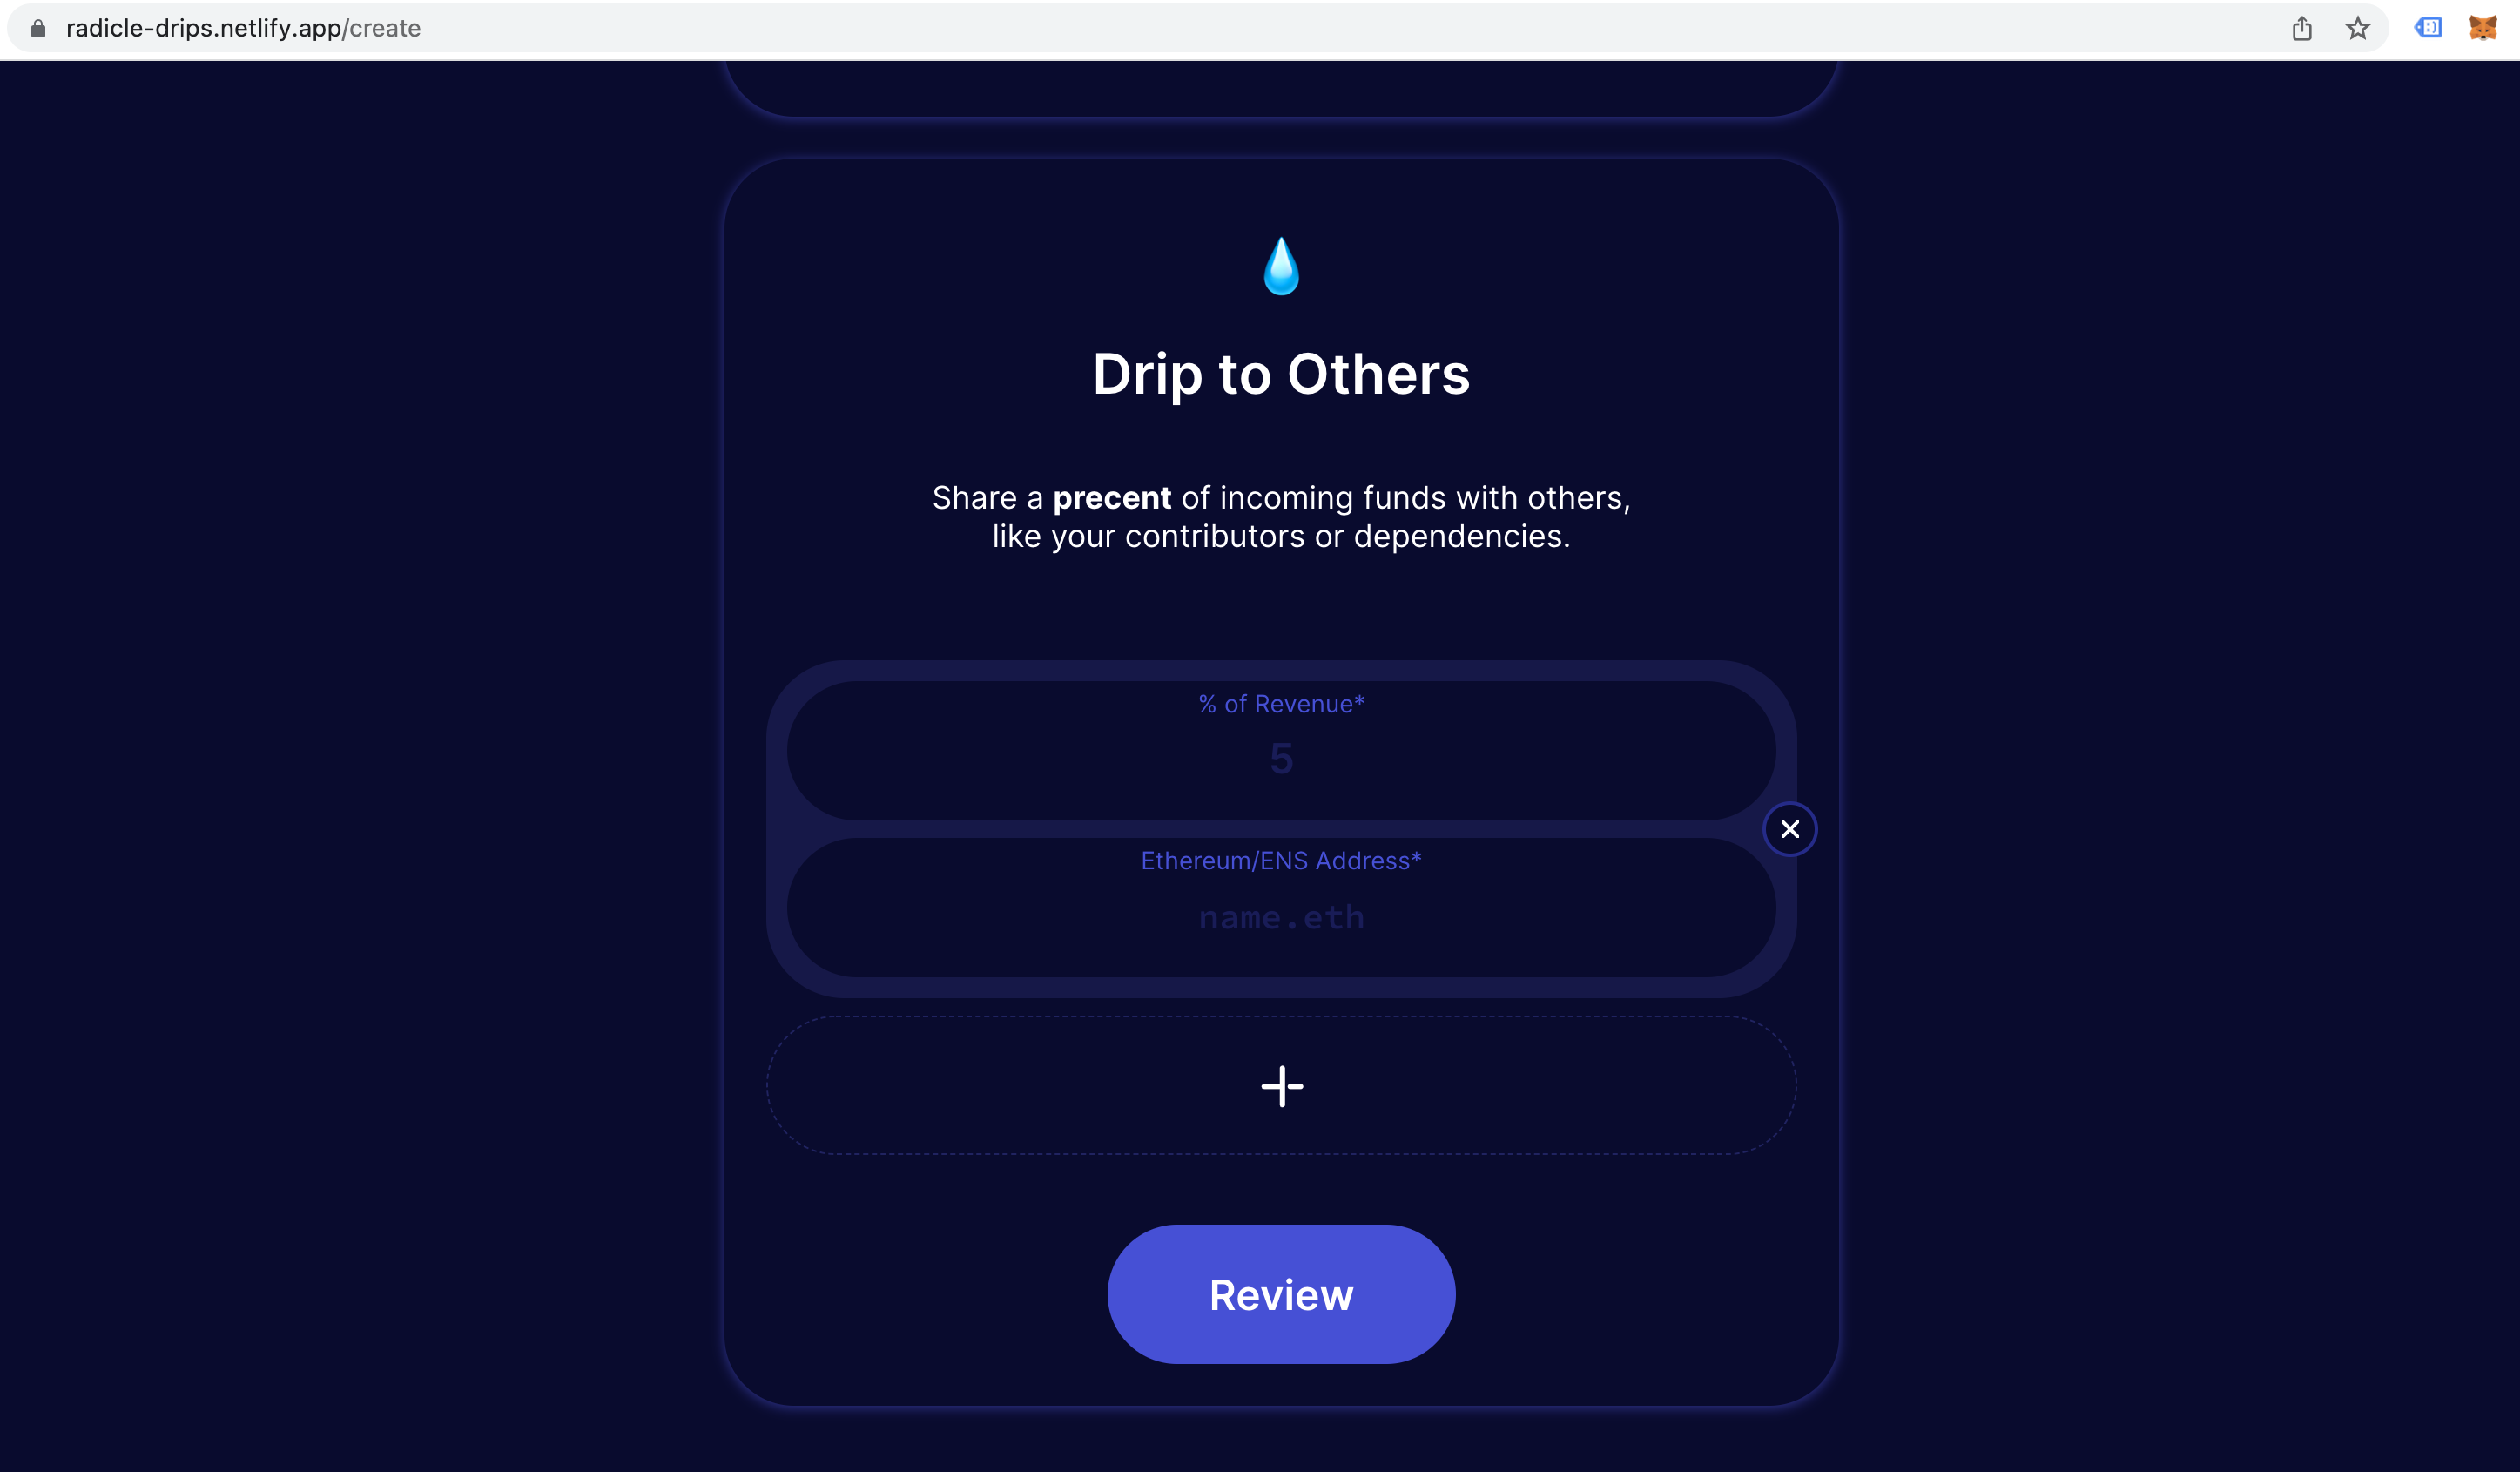
Now for the fun part! Here you can configure drips which will share a percentage of the funds your Community receives with other users or Communities in your ecosystem. For example, you might choose to drip to contributors or developers on your team, or to Communities for software libraries that you depend on.
You can add as many drip shares as you would like here by clicking the "+" button and entering the percentage of incoming funds you wish to drip, along with the Ethereum address of the recipient. Once you are finished, click "Review" to move on to a final screen to review everything before submitting your transaction to Ethereum to actually create the Community.
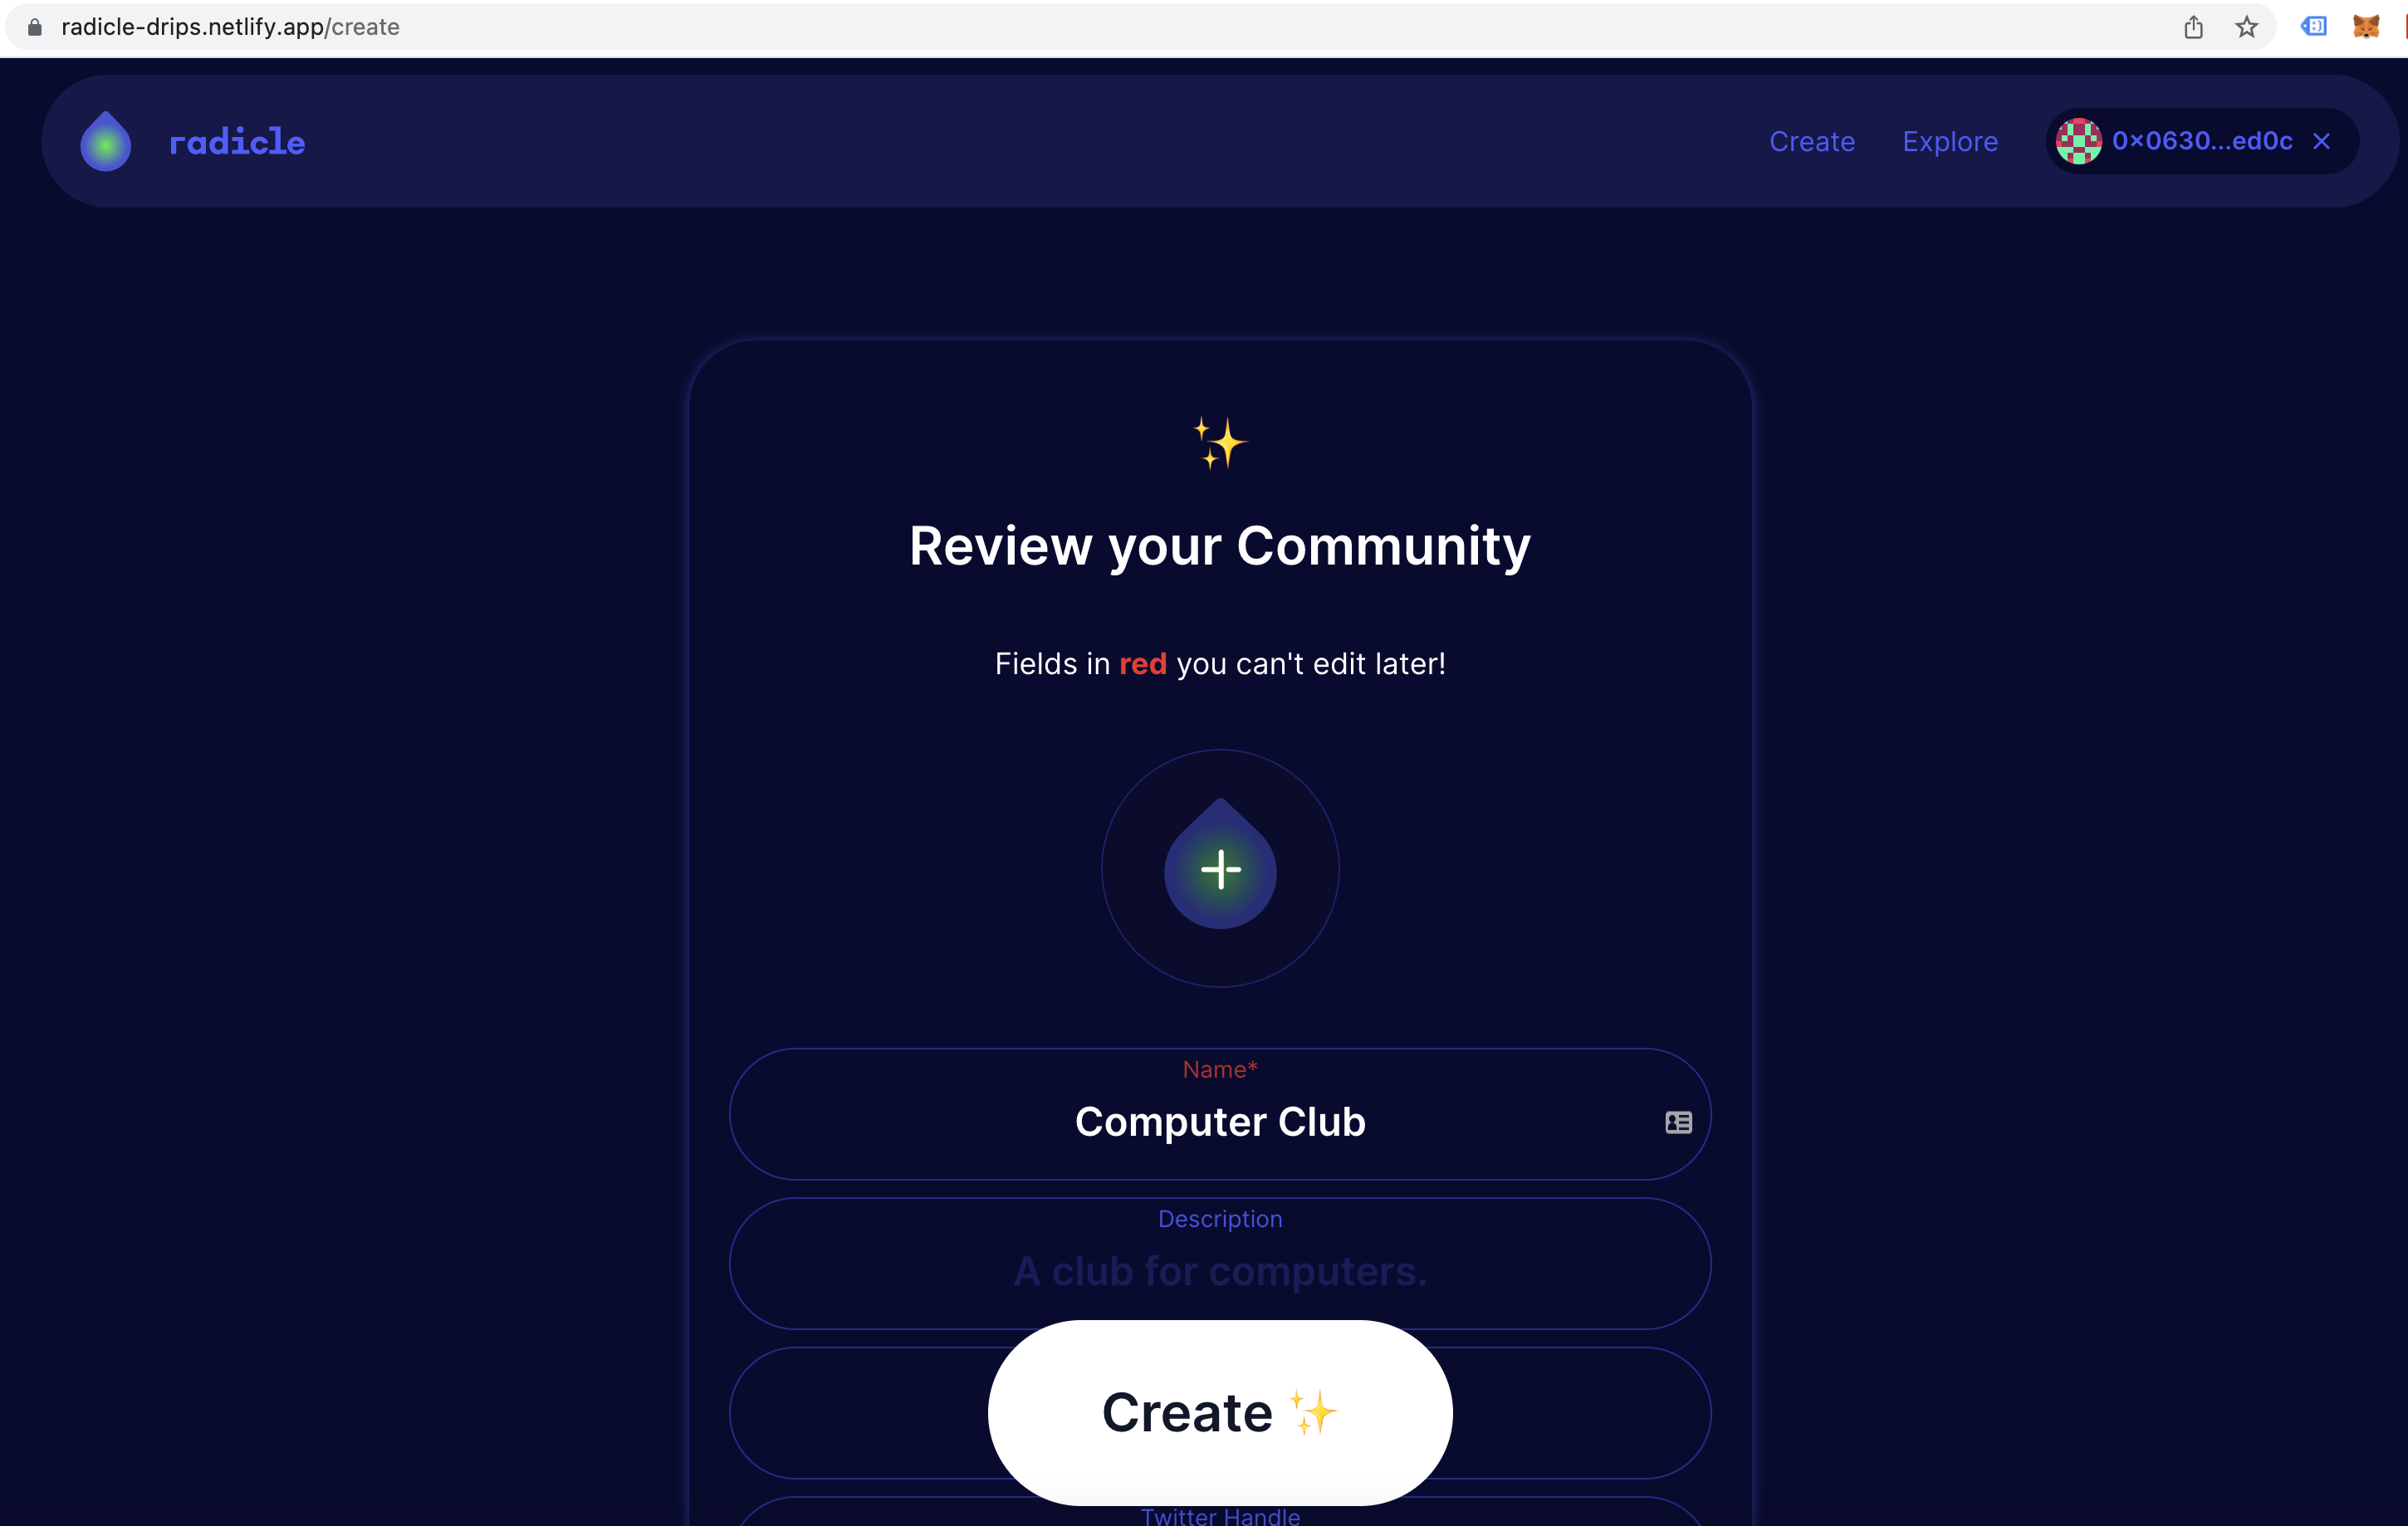
On this screen, check everything carefully and make sure it looks good! Especially the fields in red, since once you move forward those values will be permanent and cannot be changed or updated later.
When you're ready to continue, click "Create".
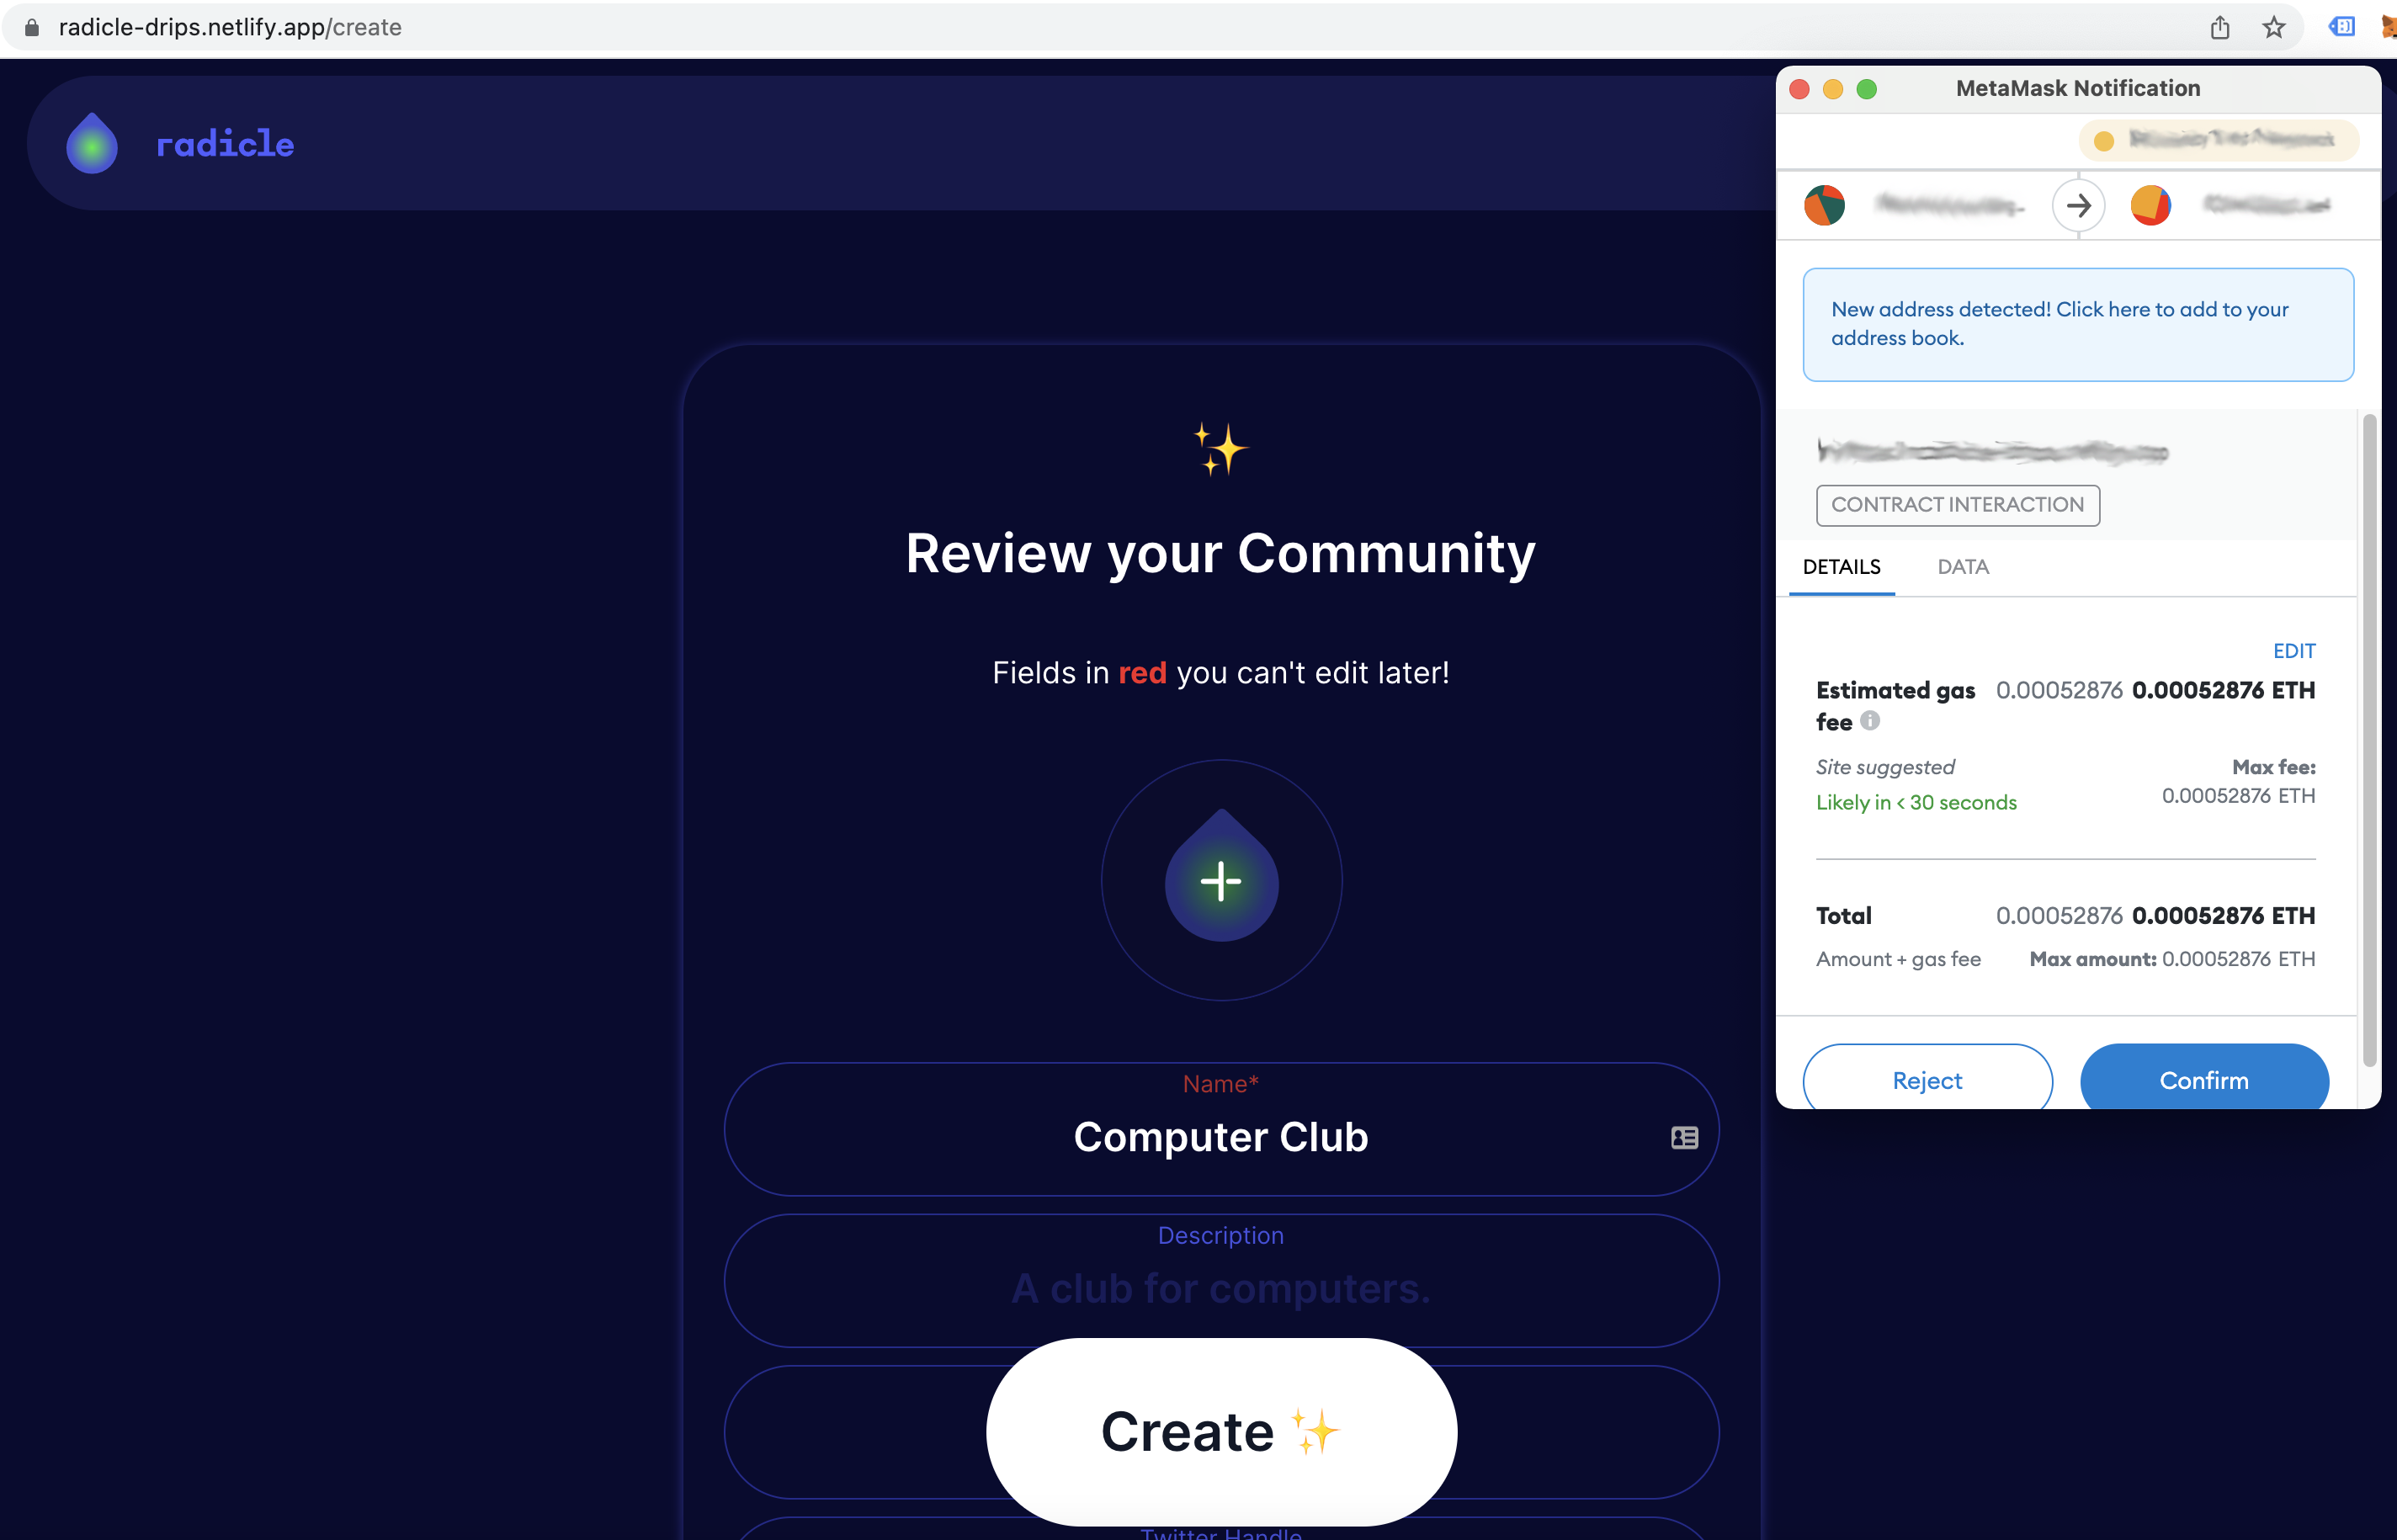
You will be prompted by your wallet to Confirm the transaction. Note that while the Drips protocol does not charge a fee to create a Community, you will need to pay the necessary gas fees to deploy the ERC-721 contract to Ethereum, so please make sure to carefully review the transaction amounts before clicking "Confirm".
After you've clicked "Confirm" there will likely be a delay of up to 1-2 minutes while the transaction is being added to a block and confirmed. Once that has happened you will be taken to the page for your new Community.
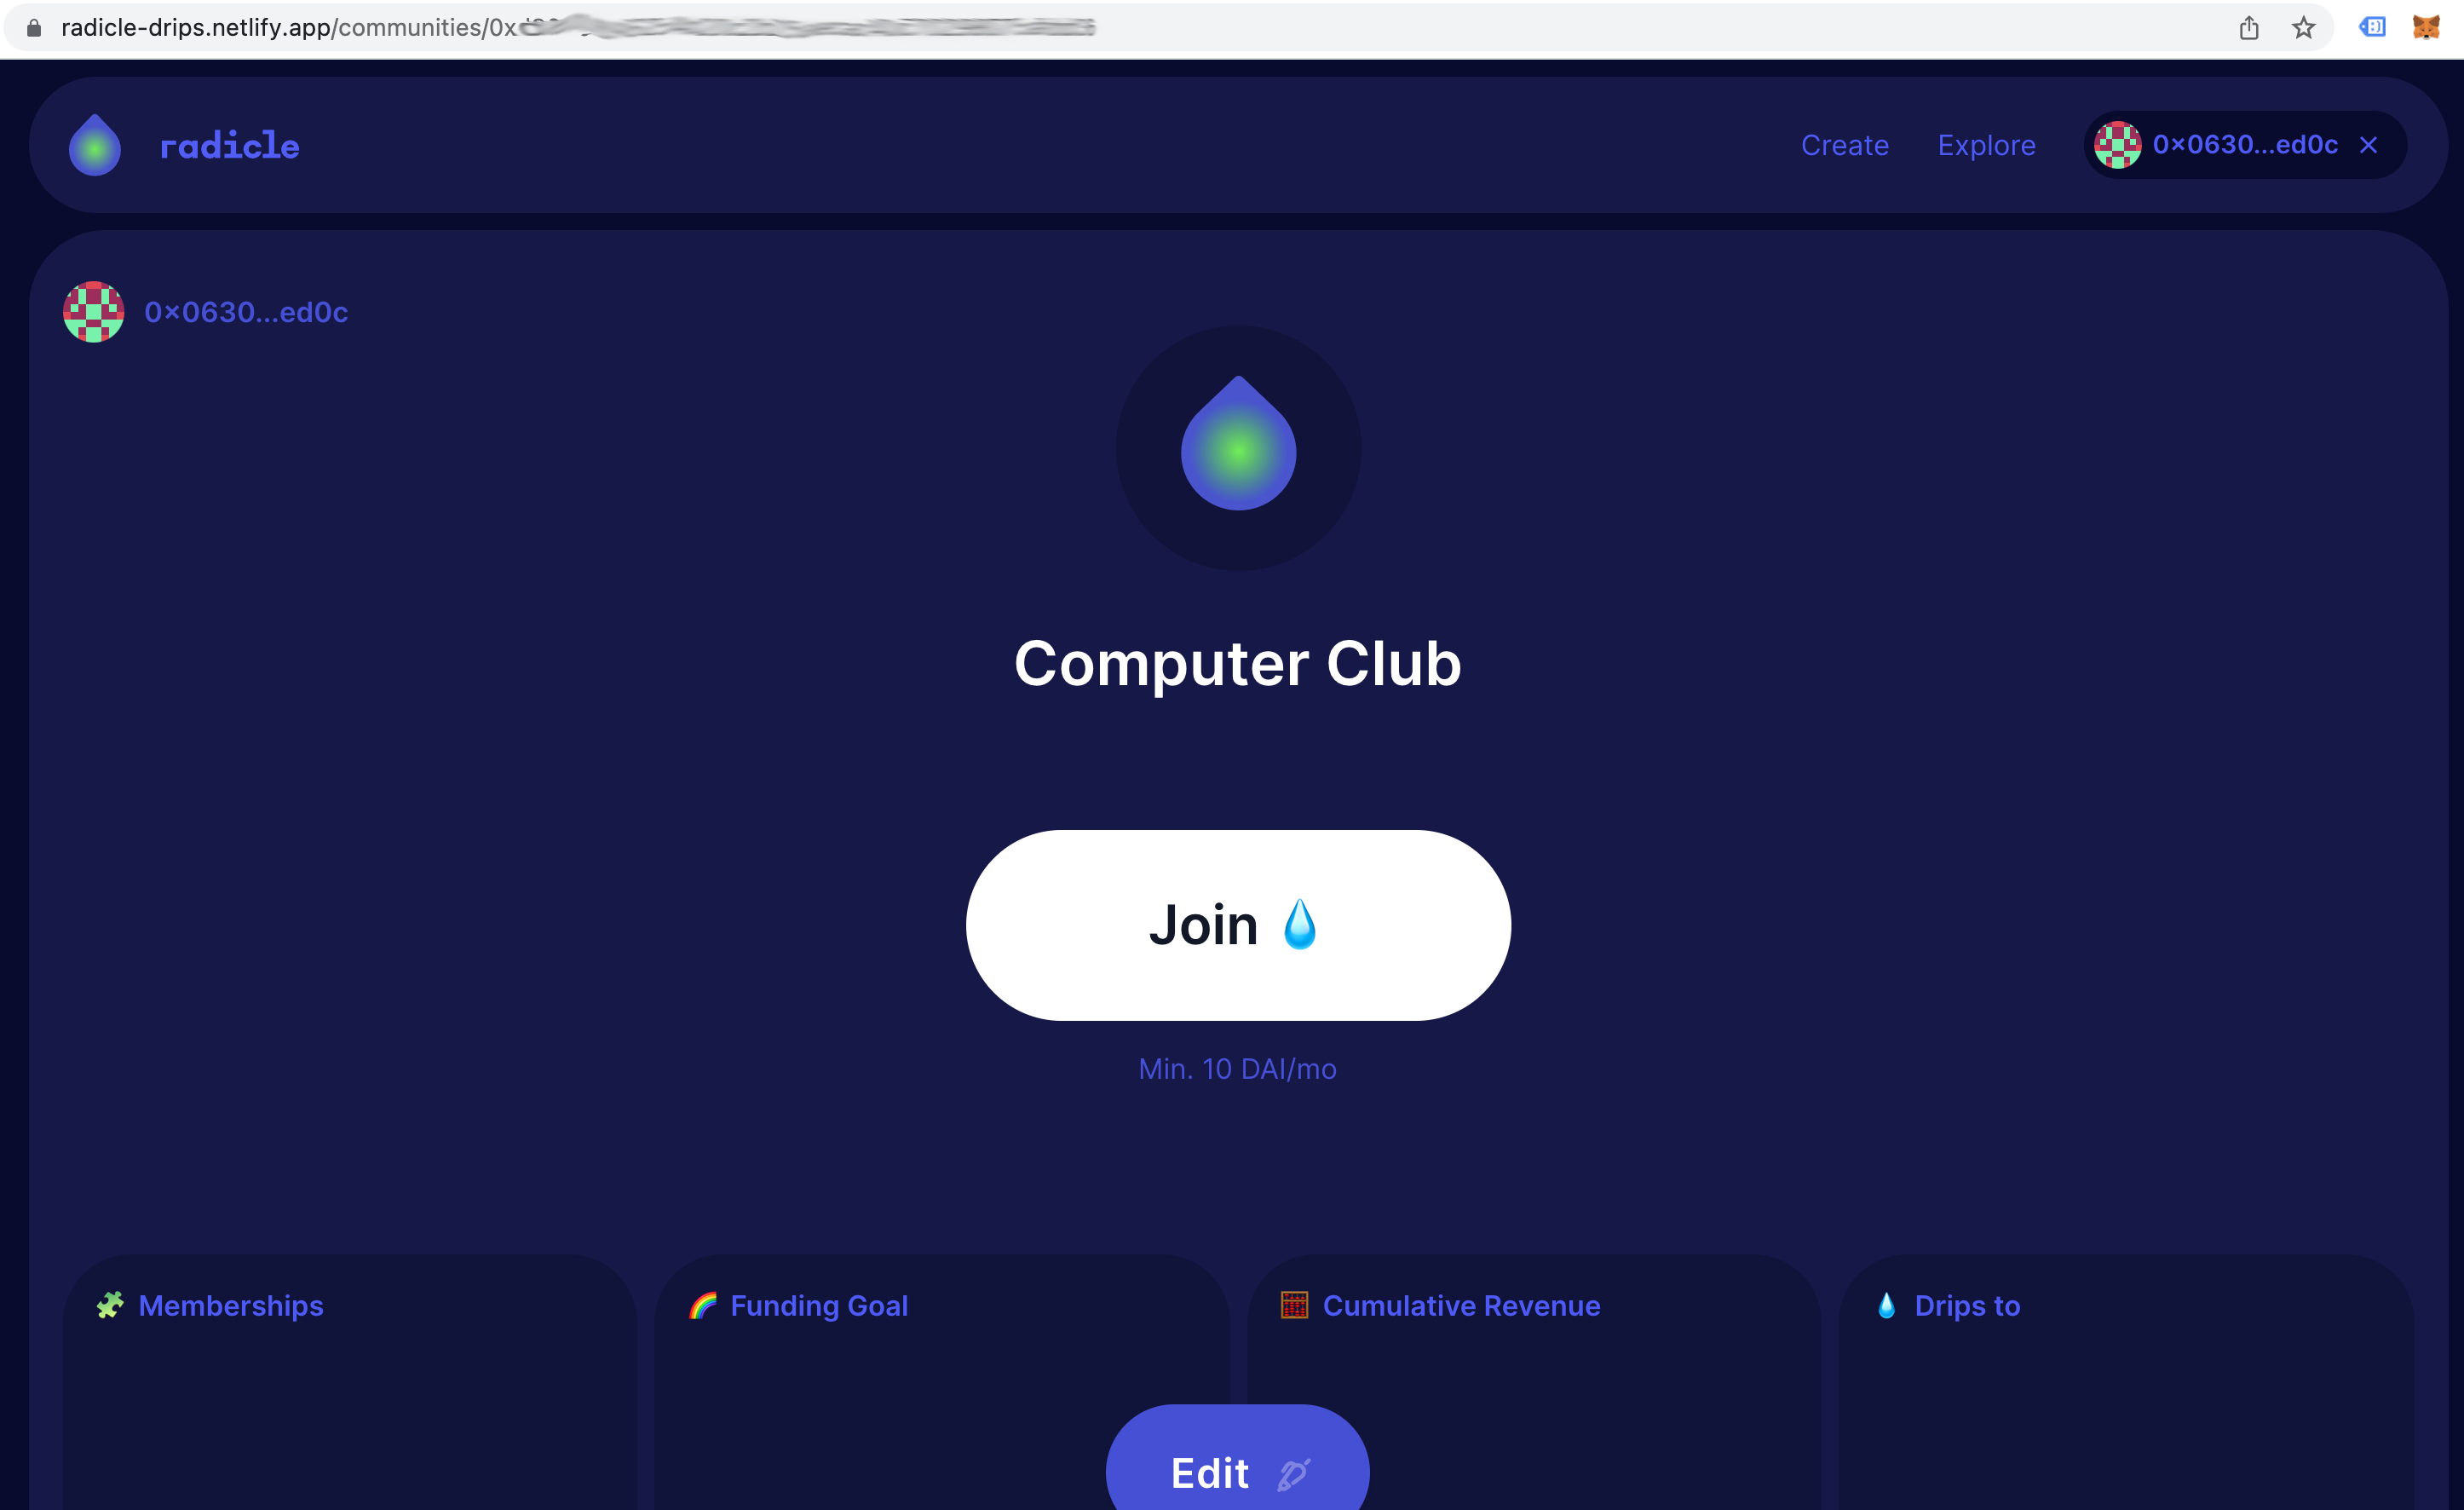
Congrats! If you've made it this far you have created a Community on Drips and are ready to start raising funds from supporters!
For a guide on how your supporters can purchase member tokens from your Community page, please head over to our Purchase a Membership guide.
For instructions on how set up benefits for your members, check out our guide on Setting Up Benefits.
